Back to the page installation guide.
IP-14-LIDKIT-V Installation Guide
Cut-in lid kit instructions for 2014-2023 Street Glide, Road Glide, Ultra models with factory, non-speaker bag lids. Take your time, protect your paint, and you’ll end up with a clean looking install.
Pro move: do the cutting with the lids still on the bags, then move the bags to a soft surface for wiring.

Kit Contents
Lay it all out first so you’re not hunting parts mid-install.
What’s in the box
- x2 cut templates
- x2 speaker grills
- x2 speaker mounting structure
- x2 speaker gaskets
- x6 template mounting screws
- x8 speaker mounting screws
- x8 grill mounting screws (machine thread)
- x1 backbone wire harness (4 conductor)
- x1 Y harness
- x2 lid harnesses
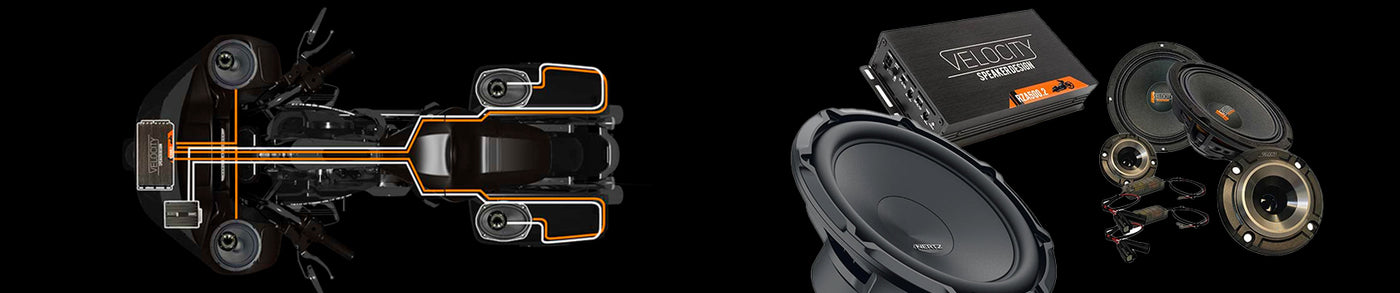
Kit photo

Preparation
This keeps the job clean and the finish protected.
- Remove the lid tether.
- Identify the parts in your kit.
- During the cut portion, it’s easiest to keep the lids on the bags.
- Prepare a clean, soft surface for the wiring portion.
- Identify routing and location of each part of the harness before you start.
Installation Steps
Tap a step to expand. Use Open/Close All if you want to read straight through.
1 Masking 1 / 9
Remove the lid tethers. Use masking tape to cover the entire area that the cut template will cover. It’s a good idea to tape an additional area around the template that covers the entire front and outside lip of the lid so the jigsaw does not come into contact with your paint. For extra stability, add a layer of tape on the edge of the cut template overlapping the tape on the saddlebag lid.

2 Fasten the Template 2 / 9
Once the tape has been applied, position the cut template on the lid so it sits snugly in place. It should not wiggle around when positioned correctly. There are three mounting screw holes in the center of each cut template. Use a 1/8" drill bit to drill pilot holes into the lid, then use the supplied sheet metal screws to secure the cut template to the saddlebag lid.

3 Drill Relief Holes 3 / 9
Using a 3/8" drill bit or a step bit, carefully drill a starting hole for your jigsaw cut. You can drill relief holes all around the cut, but you do not have to. With the correct jigsaw blade you’ll be able to turn corners without needing a hole at each corner. If your jigsaw setup does not easily turn corners, use relief holes around your cut.

4 Cut the Lid 4 / 9
Follow the cut line around the template, cutting through the plastic tabs as you go. Your kit allows for some wiggle room so the cut does not need to be perfect. But a perfect cut leaves no part of the sacrificial center section of the template in place and does not cut into the outer portion of the template. Be careful not to let your tool jump out and damage your lid. A jigsaw with variable speed is key for control. Selecting the correct blade type and setting the orbital motion will make the difference between a crazy cut and a perfect cut.
- Choose the right blade.
- Adjust the orbital motion of your saw blade.
- Adjust saw speed so it does not melt the plastic.
- Make sure nothing is in the bag so you don’t damage belongings.
- If your saw won’t go around corners easily, stop and restart from a new hole.

5 Clean Up 5 / 9
Vacuum any debris in, on, or around the saddlebag. Cutting has made quite the mess.
6 Clean the Edge 6 / 9
With the tape still in place, sand or file any cut edges as needed and smooth the opening for a perfect fit if needed.
7 Assemble 7 / 9
Using the provided machine mounting screws (pack of 8), fasten the speaker mounting structure to the speaker grill, sandwiching the lid between the speaker grill and the speaker mounting structure.
8 Gasket the Speakers 8 / 9
Bond the self-adhesive speaker gaskets to your 6x9 speakers, making sure the gasket creates an airtight seal all the way around. Pay close attention around the speaker mounting screw holes, as the gasket surface area is thinnest there.
9 Attach the Speakers 9 / 9
Use the 8 supplied speaker mounting screws to fasten your 6x9 speakers to the speaker lid kit. Orient the speakers so the speaker terminals face the rear of the bike when installed. Take your time and line the speakers up so the gaskets make a good seal.
Wiring Harness Installation
1 Mount the Template on the Right Bag 1 / 8
Start the bag harness installation by laying the right bag on a firm, clean surface where it will not shift around while you work. Remove the 4 screws from the factory lid latch bar on the rear of the bag.
Place the template on the bag with the text reading Right Side facing up. Reinstall the latch bar using those same factory screws so the template is held snugly in place. Tighten only enough so the template will not move during drilling.


2 Drill the Pilot Holes 2 / 8
Using a 1/8" drill bit, drill all 6 holes shown in the template. Take your time and keep the drill as square to the bag surface as possible so the hole pattern stays accurate and clean.
Once all 6 holes are drilled, remove the template and set it aside so it can be used later on the left bag. Reinstall the 4 screws for the latch bar and tighten them back down.


3 Enlarge the 4 Center Holes 3 / 8
Using a 3/8" drill bit, enlarge the 4 center holes. These are the holes that will give your jigsaw access to cut out the remaining material and form the square opening for the new plug.
Do not enlarge the 2 holes on either side of the center pattern. Those outer holes are for the mounting screws that will secure the new plug to the bag.

4 Tape and Cut the Opening 4 / 8
Tape the bag around the 4 enlarged holes, leaving an unmasked square in the center to use as your cutting guide. The masking helps protect the finish while also giving you a clear visual edge to work from.
Using a jigsaw, carefully cut out the remaining material so you are left with a clean square opening. Work slowly and stay in control of the blade. A clean opening here makes the plug fit better and keeps the final result looking professional.

5 Test Fit the Plug and Install the Screws 5 / 8
Test fit the plug into the opening you just cut. Make sure it slides into place cleanly and sits flush against the bag surface. If needed, do a little more edge cleanup before final installation.
Once you confirm the fit is right, install the mounting screws and secure the plug to the bag.


6 Apply the Foam Seal 6 / 8
Peel the backing off the included foam tape and apply it around the plug. Press it down firmly so it bonds well and creates a clean finished seal around the connector.
Take your time so the foam lands where you want it the first time. A neat seal not only looks better, it also helps protect the opening around the plug.


7 Route the Backbone Harness 7 / 8
Start routing the backbone harness from the bag side of the bike so the exposed section of the harness stays as short and tidy as possible. Route it well away from moving parts, sharp edges, and any area where the harness could get pinched or rubbed over time.
Use zip ties as needed to keep the harness supported and from drooping down toward suspension or other moving components. A clean route here will look better, last longer, and be less likely to cause trouble later.

8 Connect Speakers in the Lids 8 / 8
Connect the lid speaker wire harness to the lid speaker. Ensure speaker polarity is correct when making your connections. Route the speaker wire harness down to the bag and secure it forward of the lid tether using a self-adhesive zip tie mount. Use two more zip tie mounts to secure the wire harness around the front side of the bag leading to the wire harness exit point.
© Velocity Speaker Design — Installation guide content for IP-14-LIDKIT.
Back to the page installation guide