Back to the page installation guide.
WH-RTH Radio T-Harness Instructions

WH-RTH Radio T Harness – Installation Manual (v1.0, 2025-09-04)
Tools & Parts
Tools Required
- Wire strippers
- Cutters
- Connectors or solder (if attaching to DSP)
Parts Provided
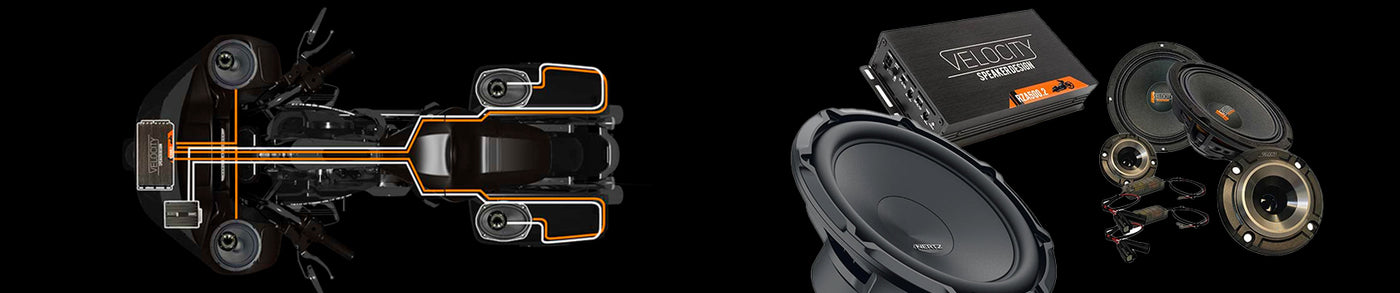
- WH-RTH Radio T Harness (see Figure 1)
- DSP modular power harness (see Figure 2)
- Vehicle accessory power harness (see Figure 3)
- RCA sub harnesses (see Figures 5–8)
- Speaker input sub harnesses (see Figure 9)
Preparation
- Skill Level: Beginner
- Estimated Time: 30 minutes
- Park the motorcycle on a stable surface with handlebars centered.
- ⚠ Warning: Disconnect the motorcycle battery before making wiring connections.
- Remove the outer fairing if needed for access.
Installation Steps
Main T Harness Connection
- Disconnect the factory radio main wire harness.
- Connect the WH-RTH T harness to the factory radio to connection point 1 (see Figure 1).
- Connect the WH-RTH T harness to the bike’s wire harness that was originally plugged into the radio to connection point 8 (see Figure 1).
DSP Power Harness (Optional)
-
If using a DSP, connect the DSP power harness (see Figure 2) to connection point 5 on the main T harness (see Figure 1).
- Strip the unterminated yellow (12V) and black (ground) wires.
- Connect these to the DSP’s power input.
- Note: This circuit is live even with ignition OFF. Do not leave wires unterminated.
- If not using a DSP, do not install the DSP power harness.
Vehicle Accessory Power Harness
-
Connect the vehicle accessory power harness (see Figure 3) to the factory accessory connector inside the fairing (see Figure 4).
The factory accessory connector can be found behind the voltage gauge. It is a black 2-pin male connector and usually has an empty female connector plugged into it.
- Remove the empty female plug from the unused 2-pin accessory connector.
- Plug in the supplied accessory power harness.
-
Connect the remote turn-on path as follows:
- With DSP: accessory harness → DSP trigger input → DSP trigger output → amplifier remote turn-on
- Without DSP: accessory harness → amplifier remote turn-on
RCA Outputs
-
Connect front RCA sub harnesses (see Figure 5):
- Left RCA (Black RCA with white & green wires) → connection point 4 (see Figure 1)
- Right RCA (Red RCA with red & black wires) → connection point 3 (see Figure 1)
- Connect rear RCA sub harness (see Figure 6) to connection point 2 (see Figure 1).
RCA Modification for Non-Compatible Amplifiers
-
If amplifier does not accept RCA high-level input:
- Cut RCA ends off the harness as shown (see Figure 7).
-
Wire color codes (see Figure 8):
- White = Left Positive
- Green = Left Negative
- Red = Right Positive
- Black = Right Negative
Once cut, strip and terminate the colored wires as needed. Connect each positive and negative lead directly to the amplifier’s high-level (speaker-level) input terminals according to the color code above. Use quality crimp connectors or solder joints, and insulate with heat shrink to prevent shorts. Do not leave any unterminated wires exposed inside the fairing.
Speaker Connections
The speaker sub harnesses provide a clean way to intercept the factory speaker circuits without running new wires through the motorcycle. They plug into the WH-RTH harness at the designated points and present unterminated leads that connect directly to your aftermarket amplifier outputs. This allows you to use the bike’s existing speaker wiring while safely integrating your amplifier.
-
Connect front speaker sub harness to connection point 7 (see Figure 1).
Connect the following unterminated circuits to the aftermarket amplifier front outputs:
- White = Left Front Positive
- White/Black = Left Front Negative
- Gray = Right Front Positive
- Gray/Black = Right Front Negative
-
Connect rear speaker sub harness (see Figure 9) to connection point 6 (see Figure 1).
Connect the following unterminated circuits to the aftermarket amplifier rear outputs:
- Green = Left Rear Positive
- Green/Black = Left Rear Negative
- Violet = Right Rear Positive
- Violet/Black = Right Rear Negative
Factory Amplifier Bypass (If Equipped)
Some Harley-Davidson touring models come from the factory with one or more amplifiers installed that must be bypassed. These factory amplifiers must be bypassed so the radio’s audio signals can be routed directly into your aftermarket system. Without a bypass harness, the stock amplifiers would block the audio path.
-
Bikes with factory amplifiers:
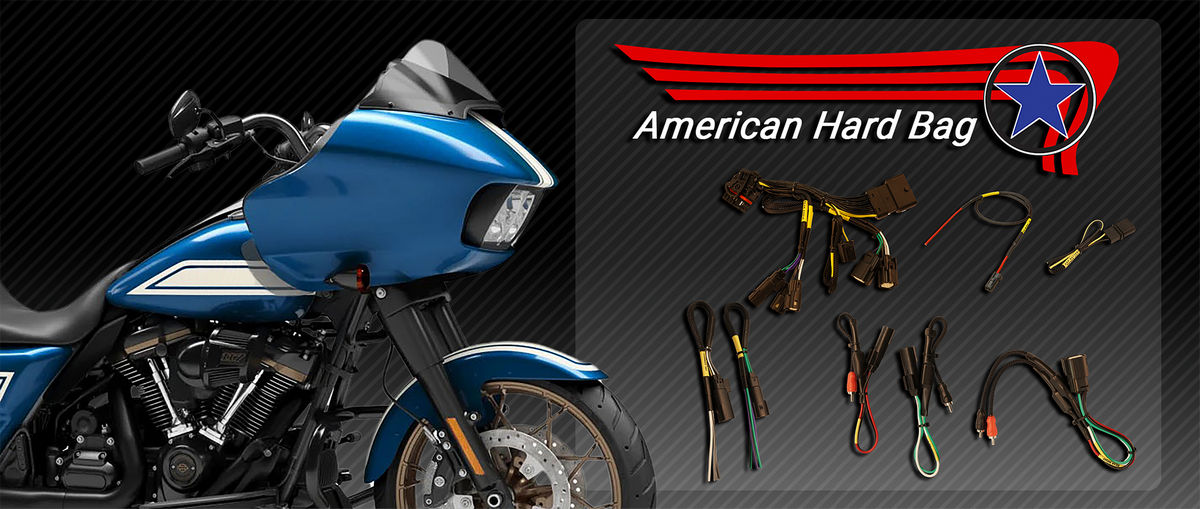
- Use American Hard Bag part WH-14-BYP-F for front amplifier bypass. This harness allows the radio’s front and rear audio signals to continue down the bike’s wiring without the factory fairing amplifier in place.
- For two-amp bikes (one in the fairing and one in the saddlebag), also use American Hard Bag part WH-14-BYP-R for rear amplifier bypass as well as WH-14-BYP-F for front amplifier bypass. This ensures the rear speaker circuits are available for connection to your aftermarket amplifier.
-
Bikes with three or four amplifiers: Only the fairing amplifier and the left saddlebag amplifier need to be bypassed to integrate an aftermarket system.
If the bike has tour-pack speakers, new aftermarket speaker wiring must be added for them.
The third and fourth factory amplifiers (right saddlebag and tour pack) use wiring schemes not compatible with aftermarket audio and should be removed from the system entirely rather than bypassed.
Rockford Fosgate Amplifier Notice 2021–2022 Bikes equipped with the factory Rockford Fosgate amplifier located in the left saddlebag will require a bypass plug, WH-RFBYP, made by American Hard Bag.
Optional Slim Installation
-
For non-Ultra models without DSP power needs:
- Disconnect front speaker service connectors at each of the fairing speaker enclosures.
- Plug front RCA sub harnesses directly into bike harness that you just unplugged from the enclosure.
- Use American Hard Bag part WH-SP-POD or WH-FPOD harnesses to connect aftermarket amplifier outputs back to front speakers.
-
For rear RCA on non-Ultra models:
- Locate the unused 4-pin black Molex MX150 rear speaker output connector, which branches off near the radio harness on the clutch side of the fairing. This is the factory rear speaker output connection point used when rear speakers are added later. This connector may have a rubber plug installed for weather sealing; remove it to access the rear RCA connection point.
- Remove plug, connect rear RCA harness.
- On CVO models, connector is under the seat and is not located behind the radio.
- For Ultra models: Always use full WH-RTH harness for rear RCA and speaker access. The slim installation is not an option for Ultra models.
Verification & Testing
- Reconnect motorcycle battery.
- Turn ignition to Accessory.
-
Verify:
- Amplifier(s) or DSP power on correctly.
- Audio present at all speakers.
- Remote turn-on functions as expected.
Troubleshooting
| Symptom | Likely Cause | Fix |
|---|---|---|
| No power to DSP | DSP harness not connected to point 5 | Verify harness connection |
| No amplifier turn-on | Accessory power harness miswired | Check accessory harness routing |
| No sound from speakers | RCA harness not seated | Reseat RCA connectors |
| No audio | Amplifier not compatible with RCA high-level | Modify harness to direct wire-level connections (cut RCA ends and connect bare wires) |
Figures & Captions
- Figure 1 — Main radio T harness with connection points labeled
- Figure 2 — DSP modular power harness
- Figure 3 — Vehicle accessory power harness
- Figure 4 — Location of accessory power connector in fairing
- Figure 5 — Front RCA output sub harnesses
- Figure 6 — Rear RCA output sub harness
- Figure 7 — Rear RCA sub harness modification example
- Figure 8 — Modified RCA sub harness with color legend
- Figure 9 — Speaker input sub harnesses (front and rear)
Figures (Tap any image to Zoom)


Back to the page installation guide