

Why Your Harley Fairing Audio Upgrade Makes or Breaks Every Ride
A harley fairing audio upgrade is one of the most impactful changes you can make to your touring bike. Here's a quick look at your best options:
Top Harley Fairing Audio Upgrade Options (2026)
| Option | Best For | Price Range |
|---|---|---|
| Front Fairing Speaker Upgrade | Clearer sound from the rider-facing speakers | Varies by model |
| Fairing Speaker + Amplifier Kit | Higher volume and cleaner output at highway speeds | Varies by model |
| 4-Speaker Touring System | Balanced sound for rider and passenger | Varies by model |
| 2024+ 8-Inch Fairing Speaker Upgrade | Larger speaker fitment on newer Touring models | Varies by model |
| Full Bike Audio System | Complete audio overhaul with fairing and rear speakers | Varies by model |
Factory Harley speakers are built to a budget. At highway speeds - with wind, engine rumble, and road noise competing for your attention - stock audio simply falls short. Most riders describe the experience the same way: you're turning the volume all the way up, and it's still not enough.
The frustrating part? The fairing itself is one of the best acoustic spaces on the bike. It just needs the right speakers, the right amplifier, and - in some cases - the right setup to unlock it.
At American Hard Bag, we're a US-based manufacturer of premium motorcycle accessories with deep experience helping riders choose and install the right harley fairing audio upgrade components. We'll walk you through everything you need to know to get crystal clear sound on the road.
Choosing the Right Harley Fairing Audio Upgrade
Selecting the perfect harley fairing audio upgrade requires understanding your bike's acoustic environment and your personal riding habits. The fairing on your Street Glide or Road Glide acts as a physical barrier against the wind, but it also serves as a critical speaker enclosure. To get the most out of this space, you must choose a setup that balances speaker count, power, and physical fitment.

The first major decision most riders face is choosing between a 2-speaker and a 4-speaker configuration. While a simple 2-speaker upgrade focuses entirely on the front fairing, a 4-speaker system expands the soundstage to the rear of the bike, typically utilizing the saddlebag lids or Tour-Pak locations.
| Feature | 2-Speaker Configuration | 4-Speaker Configuration |
|---|---|---|
| Primary Location | Front Fairing (Left & Right) | Front Fairing + Saddlebag Lids or Tour-Pak |
| Acoustic Focus | Direct driver-facing soundstage | Full-vehicle surround sound dome |
| Amplifier Requirements | Compact 2-channel or bridged 4-channel | High-power 4-channel (or dual amplifiers) |
| Highway Performance | Excellent up to 75 mph (with proper amp) | Unmatched clarity and bass at any highway speed |
| Installation Complexity | Moderate (Fairing disassembly only) | High (Requires routing wires to rear bags) |
| Best For | Solo riders, budget-conscious builds | Touring with passengers, maximum bass output |
Key Benefits of a Harley Fairing Audio Upgrade
Upgrading your fairing audio goes far beyond simply making your music "louder." A high-quality aftermarket system fundamentally changes how sound travels from your bike to your ears:
- Unmatched Audio Clarity: High-performance aftermarket speakers are engineered with advanced materials like carbon fiber cones and titanium dome tweeters. This allows them to reproduce high frequencies and mid-bass notes cleanly, preventing the muddy, distorted sound characteristic of factory speakers pushed to their limits.
- Passenger Comfort: A robust front fairing upgrade ensures that your passenger doesn't just hear a muffled wall of noise. When paired with rear speakers, it creates a balanced "sound bubble" that makes long-distance touring much more enjoyable for both riders.
- True Weatherproofing: Standard car audio speakers will quickly rot and fail when exposed to rain, UV rays, and road salt. Premium motorcycle systems feature marine-grade weatherproofing to ensure your investment survives the elements.
- Enhanced Mid-Bass Response: Advanced designs, such as specialized bass reflex technology, can yield up to twice the mid-bass response of traditional open-air speaker mounts by controlling air movement behind the speaker cone.
For riders looking to completely overhaul their system with parts designed specifically to withstand the brutal vibration of the open road, exploring American Hard Bag Harley Audio Kits is the logical first step to finding a system engineered for your exact model.
Selecting the Perfect Kit for 2024+ Touring Models
The landscape of Harley-Davidson touring bikes changed dramatically with the introduction of the redesigned 2024+ Street Glide and Road Glide models. These modern touring machines feature entirely redesigned fairings, advanced electrical architectures, and the powerful Skyline OS touchscreen infotainment system.
If you own a 2024 or newer model, you must be aware of several critical physical and electrical changes:
- Larger Speaker Accommodations: Older Touring models (2014–2023) standardly housed 6.5-inch fairing speakers. The 2024+ Road Glide and Street Glide fairings are designed to accommodate larger speaker profiles, allowing for massive 8-inch speaker upgrades directly in the inner fairing. This jump in size dramatically increases cone surface area, resulting in significantly deeper bass and richer mid-range response without requiring custom fiberglass modification.
- Skyline OS Integration: The factory infotainment system is highly sophisticated. Aftermarket upgrades must be fully compatible with this digital interface. Using premium, vehicle-specific kits ensures that your handlebar controls, automatic volume control (AVC), and system diagnostics continue to function flawlessly.
- Power Limitations: The modern electrical charging systems on these bikes are highly efficient, but they are also sensitive to voltage drops. Your upgrade must utilize highly efficient Class D amplifiers that extract maximum wattage while drawing minimal current from your motorcycle’s stator.
Key Components of a High-Performance Fairing Audio System
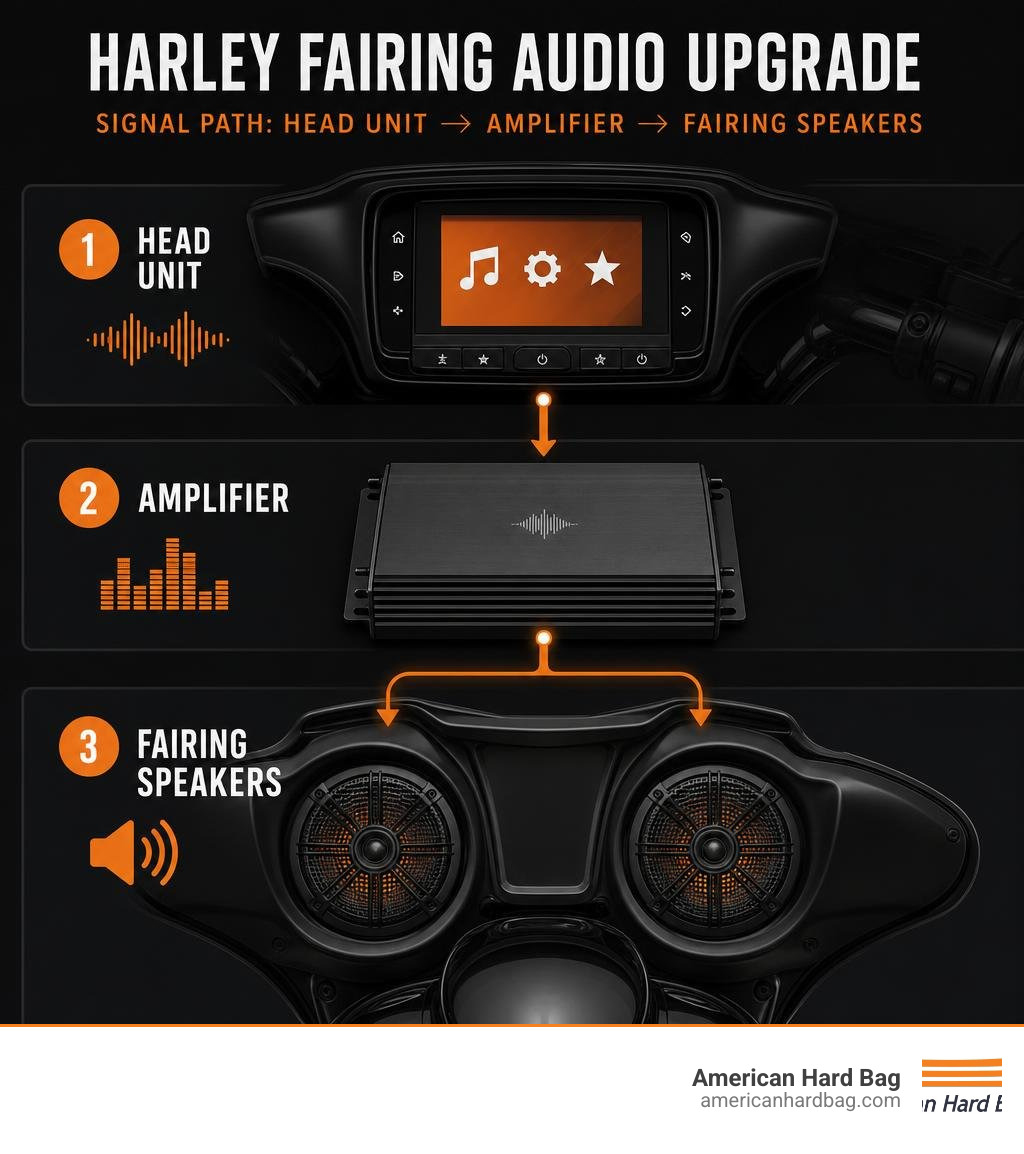
To build a harley fairing audio upgrade that sounds as good parked at a bike night as it does screaming down the interstate at 80 mph, you need to understand the individual components that make up the system.

A truly high-performance motorcycle audio system is comprised of several essential components working in perfect harmony:
- The Source Unit (Head Unit): Sends the clean audio signal.
- The Digital Signal Processor (DSP): Equalizes the sound to compensate for wind noise and motorcycle acoustics.
- The Amplifier: Boosts the signal to high-voltage power.
- The Speakers: Convert the power into physical sound waves.
- The Enclosure/Fairing: Provides the acoustic backdrop and structural support.
- The Wiring Harness: Connects everything safely without cutting OEM wires.
The Role of High-Powered Amplifiers
We will say this as clearly as possible: you cannot achieve crystal clear sound at highway speeds without an external amplifier.
Factory head units typically output a meager 15 to 25 watts of power per channel. When you try to push that tiny signal over the roar of a V-twin engine and rushing wind, the head unit clips, sending a highly distorted, squared-off wave signal directly to your speakers. This distortion is what actually destroys speaker voice coils - not raw volume.
Adding a high-quality amplifier solves this problem completely:
- Clean Headroom: A high-powered amplifier, such as a 250-watt (125W x 2 @ 4 ohms) or a massive 500-watt primary amplifier, provides the "headroom" your system needs. You can play your music incredibly loud without the signal distorting or clipping.
- Class D Technology: Modern motorcycle amplifiers utilize Class D circuitry. Unlike older Class A/B amplifiers which run incredibly hot and draw massive amounts of current, Class D amplifiers are highly efficient, compact, and convert nearly all input energy directly into clean audio power.
- Compact Footprints: Modern motorcycle-specific amplifiers are designed to deliver strong output while fitting inside the tight confines of a Street Glide or Road Glide fairing. A proper mounting bracket and plug-and-play harness help keep the installation secure, serviceable, and protected from vibration.
Weatherproofing and Durability Standards
Motorcycle audio gear lives a hard life. It is subjected to blistering engine heat, freezing rain, intense UV radiation, and constant high-frequency engine vibration. Standard car audio components will fail rapidly in this environment.
When shopping for your harley fairing audio upgrade, look for these specific durability standards:
- IP66 Weatherproof Rating: This rating ensures that the speakers and amplifiers are completely dust-tight and protected against powerful jets of water. You should be able to ride through a torrential downpour or wash your bike without worrying about ruining your sound system.
- Conformal Coated Circuit Boards: High-quality motorcycle amplifiers feature circuit boards coated in a protective silicone or epoxy layer. This prevents moisture from condensing on the board and causing a short circuit.
- Neodymium Magnets: Unlike heavy strontium ferrite magnets used in car speakers, premium motorcycle speakers utilize neodymium magnets. Neodymium is incredibly powerful, allowing manufacturers to design ultra-lightweight, shallow-mount speakers that deliver massive performance without putting unnecessary physical strain on your inner fairing brackets.
- UV-Stabilized Materials: Speaker cones made of treated paper will quickly disintegrate when exposed to sunlight. Look for carbon-fiber, polypropylene, or woven-fiberglass cones with UV-stabilized rubber surrounds that won't crack or fade over time.
Installation Considerations and Best Practices
Installing a harley fairing audio upgrade can be an incredibly rewarding DIY project, but it requires patience, the right tools, and an attention to detail. Because modern Harley-Davidson motorcycles rely heavily on complex Controller Area Network (CAN-bus) wiring systems, a single mistake can trigger diagnostic trouble codes or damage sensitive electronics.
Step-by-Step Guide to Your Harley Fairing Audio Upgrade
Before you grab your T27 Torx driver and start ripping screws out of your outer fairing, take a deep breath and review these essential steps to ensure a flawless installation:
- Disconnect the Main Fuse: This is the single most important safety step. Never touch your bike's electrical system or unplug factory audio harnesses with the main system fuse installed.
- Protect Your Front Fender: Lay a thick, soft towel or fender cover over your front fender. When removing the outer fairing, it is incredibly easy to accidentally drop a tool or slip the fairing itself, resulting in a costly scratch to your custom paint.
- Remove the Outer Fairing: Carefully remove the windshield and the outer fairing mounting screws. Keep track of which screws go where, as they are often different lengths.
- Disconnect and Swap Speakers: Unplug the factory speaker connectors. Install your new high-performance woofers and tweeters. Always pay close attention to side-specific markings (such as "A" and "B" orientations) and torque all speaker mounting screws to manufacturer specifications (typically 1.6–2.3 N·m or 14–20 in-lbs for speaker screws, and 5.4–6.8 N·m for enclosure mounting screws).
- Mount the Amplifier: Secure your amplifier using a motorcycle-specific mounting bracket. Never use double-sided foam tape to mount an amplifier to the top of your radio head unit; the heat generated by the amp can damage the radio, and road vibration will eventually shake it loose.
- Route the Power and Ground: Run your heavy-gauge power and ground wires directly to the battery. Always route these wires along the factory wiring channel under the gas tank, ensuring they are clear of hot engine components and pinch points near the steering neck. For complete wiring guidance, consult the official 1874969140101451137 resources.
- Plug and Play Connections: Utilize a high-quality, pre-wired plug-and-play harness. This eliminates the need to cut, splice, or solder your factory wiring, preserving your bike's factory warranty and making future troubleshooting incredibly easy.
For detailed, step-by-step illustrations and physical hardware layout instructions tailored to your specific model year, we highly recommend referencing our comprehensive Manual Installation guide.
Radio Flashing and EQ Calibration
One of the most commonly misunderstood aspects of upgrading a Harley-Davidson audio system is the factory radio EQ curve.
To prevent cheap factory paper speakers from blowing, Harley-Davidson programs a highly aggressive equalization (EQ) curve into the factory head unit. As you turn the volume up, the radio automatically cuts the bass frequencies and boosts the harsh high-mid frequencies.
If you connect a high-powered amplifier and premium aftermarket speakers to this uncorrected signal, the result will sound incredibly harsh, thin, and painful to listen to. Worse yet, it can cause immediate speaker damage.
You have two primary ways to fix this:
- Digital Technician Radio Flash: You can take your bike to an authorized dealer or a specialized audio shop to have the head unit "flashed" using a digital diagnostic tool. This reprograms the radio to output a flat, clean audio signal across the entire frequency range.
- EQ-Flattening Wire Harnesses: Some premium aftermarket kits include specialized inline wiring harnesses designed to physically flatten the factory EQ curve before the signal ever reaches your amplifier. This completely eliminates the need to visit a dealership for a radio flash.
If you encounter any issues during the setup process, such as system noise, engine whine, or a lack of sound output, refer to our Manual Installation troubleshooting resource to quickly isolate and resolve the issue.
Frequently Asked Questions About Harley Fairing Audio
To help you make the most informed decision possible, we've compiled answers to the most common questions riders ask when looking to upgrade their fairing audio.
Do I need an amplifier for my fairing speakers?
Yes. While you can physically connect aftermarket speakers directly to the factory head unit, they will not perform well. High-quality aftermarket speakers feature larger voice coils and stiffer cone materials designed to handle real power. Without an external amplifier, your factory head unit will struggle to drive them, resulting in low volume, poor bass response, and heavy distortion at highway speeds. If you want to hear your music clearly over wind and exhaust noise, an amplifier is mandatory.
Can I install a fairing audio upgrade myself?
Absolutely! Thanks to modern plug-and-play wiring harnesses and custom-engineered mounting brackets, you do not need to be a professional car audio installer to upgrade your Harley's sound system. If you have a basic set of hand tools (Torx drivers, sockets, and zip ties) and the patience to follow step-by-step instructions, you can easily complete a basic 2-speaker or 4-speaker upgrade in your garage over a weekend.
For riders who prefer a curated selection of premium components, choosing pre-configured packages designed specifically for your bike can help ensure a straightforward self-installation.
What is the difference between Stage I, II, and III audio?
The "Stages" refer to the performance level and complexity of the audio components:
- Stage I: This is a basic upgrade, typically consisting of improved coaxial speakers designed to run on factory power or a very small, low-wattage amplifier. It offers better clarity than stock but limited overall volume.
- Stage II: A significant step up, Stage II systems introduce high-power external amplifiers, typically 250W or more, and higher-output speakers designed to deliver stronger detail and higher volume levels.
- Stage III: The ultimate performance level. Stage III-style systems use larger multi-speaker layouts and higher total system power, often including fairing speakers plus rear speaker locations such as saddlebag lids or a Tour-Pak. This stage is designed to deliver concert-level volume and deeper bass that can cut through road noise.
Conclusion
Upgrading your Harley-Davidson's fairing audio is the single best way to elevate your riding experience. By replacing those weak, factory-installed paper cones with high-performance, marine-grade speakers and pairing them with a clean, efficient Class D amplifier, you can transform your motorcycle into a rolling concert hall.
Whether you are riding a brand-new 2024+ Road Glide with the Skyline OS or a classic Street Glide, the key to success lies in choosing components engineered specifically for the brutal motorcycle environment. Avoid cheap car audio gear, prioritize weatherproofing, and ensure your system is properly wired and flashed.
Ready to take the next step toward audio perfection? Read our comprehensive Ultimate Guide to Upgrading Your Harley-Davidson Audio System to plan your dream build and get back on the road with crystal clear sound!