Velocity 10" Razor Harley Woofer Installation

|
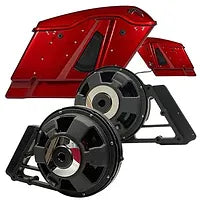
The following is installation instructions are for Velocity 10" subwoofers with an American Hard Bag Pro100 installation kit. Before you start it is important to understand how a subwoofer functions in a bike system so that you can get the most out of it. A subwoofer on a bike is nothing like a subwoofer in a car, boat, or home audio system. The speaker is different, the environment is different, and the settings could not be more different. Setting up a subwoofer on a Harley as you would in a car or any other application will not turn out well. But setting it up correctly as described here will yield spectacular results that sound big, bold, and stupid loud. |
Proper Setup
Before we get into installation let's touch on what the end goal is. Bass frequencies in a car audio system are amplified by the structure of the car. The steel frame of the car reflects the bass just like a mirror reflects light. Because of this in a car the bass gets stronger as it gets lower. On a bike the opposite is true. The bass gets weaker as it gets lower and there is nothing to reflect it back at the listener and it does not get amplified by reflective surfaces at all.
The Strategy
Harley subwoofer systems are designed to work in conjunction with other smaller speakers on the bike for a much bigger bolder sound overall rather than an exaggerated bass that you would expect from a car audio system. The best subwoofer setup strategy on a bike is to maximize cone size and focus all of the energy into the bass range that can be best heard on a bike. This range is 40hz to 400hz. Fortunately 90% of music energy comes from this range. So the end result is spectacular and sounds great. What we don't want to do is to play the subwoofer below 40hz at all. What we can't do is artificially boost bass below 100hz in an attempt to get it to sound like a car. Doing so is not reasonable and will quickly overdrive the subwoofer. Small boosts in bass on the radio or EQ result in huge changes in how far the speaker cone must travel and it does not make much more bass that you can hear at all. All you accomplish is speaker torture. Instead we want to allow the subwoofer to naturally produce bass without boosting with bass adjustments on the radio or an equalizer and then we want to raise the amplifier gain to get more output. The result is an increase in a much wider range than what we would get in a car. It sounds loud, it feels loud, it is loud. The final result is much more like live music than a boomy car and it sounds bigger than life. Just different than a car.
Get the setup Right!
At the end of this article we explain the specific amplifier and DSP settings that you will need to make. Pay attention and get it right. You will be glad you did.
stewThe following is installation instructions are for Velocity 10" subwoofers with an American Hard Bag Pro100 installation kit. Before you start it is important to understand how a subwoofer functions in a bike system so that you can get the most out of it. A subwoofer on a bike is nothing like a subwoofer in a car, boat, or home audio system. The speaker is different, the environment is different, and the settings could not be more different. Setting up a subwoofer on a Harley as you would in a car or any other application will not turn out well. But setting it up correctly as described here will yield spectacular results that sound big, bold, and stupid loud.
Proper Setup
Before we get into installation let's touch on what the end goal is. Bass frequencies in a car audio system are amplified by the structure of the car. The steel frame of the car reflects the bass just like a mirror reflects light. Because of this in a car the bass gets stronger as it gets lower. On a bike the opposite is true. The bass gets weaker as it gets lower and there is nothing to reflect it back at the listener and it does not get amplified by reflective surfaces at all.
The Strategy
Harley subwoofer systems are designed to work in conjunction with other smaller speakers on the bike for a much bigger bolder sound overall rather than an exaggerated bass that you would expect from a car audio system. The best subwoofer setup strategy on a bike is to maximize cone size and focus all of the energy into the bass range that can be best heard on a bike. This range is 40hz to 400hz. Fortunately 90% of music energy comes from this range. So the end result is spectacular and sounds great. What we don't want to do is to play the subwoofer below 40hz at all. What we can't do is artificially boost bass below 100hz in an attempt to get it to sound like a car. Doing so is not reasonable and will quickly overdrive the subwoofer. Small boosts in bass on the radio or EQ result in huge changes in how far the speaker cone must travel and it does not make much more bass that you can hear at all. All you accomplish is speaker torture. Instead we want to allow the subwoofer to naturally produce bass without boosting with bass adjustments on the radio or an equalizer and then we want to raise the amplifier gain to get more output. The result is an increase in a much wider range than what we would get in a car. It sounds loud, it feels loud, it is loud. The final result is much more like live music than a boomy car and it sounds bigger than life. Just different than a car.
Get the setup Right!
At the end of this article we explain the specific amplifier and DSP settings that you will need to make. Pay attention and get it right. You will be glad you did.
STEP 1

|
 |
STEP 2

STEP 3
Note how far down the assembly will go in the bag before either the woofer frame touches the half round extrusion at the bottom of the bag (see pic below) or the woofer mount touches the bottom of the bag. It is a good idea to allow a couple off millimeters of space between the woofer frame If the woofer frame touches the bag. Some woofers do not come into contact with the bag at all. This generally is a only a concern when using fiberglass aftermarket bags that are not perfectly shaped inside. Also note that the bottom corner of the bag has a radius between the vertical wall and the bag bottom. You do not want the woofer mount bottom to be on this radius as it will not allow the mount to sit flat.

|
 |
Horizontal Alignment
Mark the woofer mount's position with a pen or marker.

|
 |
Be sure that the marked grill hole does not end up over the edge of the shock hump. You want to keep the hole centered as much as possible on the flat part of the hump.

STEP 4
Check for lid clearance.
With both the woofer and the mount in the bag, carefully check that the lid, hardware, and that any accessories (like lid speakers) will all clear the woofer and the mount once assembled. Always do this before committing to drilling any holes.
STEP 5
Drilling the mounting holes
Remove the woofer and insert a 1/8" drill bit down through each of the mounting points. Spin the drill bit by hand to mark each hole. Once all holes are marked, remove the mount and drill each hole with an angle drill, a 3/16" drill bit, and a power drill.

|
 |
Be sure not to mistake any of the woofer mounting holes for holes that are supposed to be drilled through the bag. The pic below shows the 7 holes that need to be drilled through the bag.


STEP 6
Mounting the square templates
Make sure to tape over the painted surface of the bag before mounting the router template.


Notice that the three template nuts are lock nuts. This is to keep the hardware from coming loose while cutting and routing.

STEP 7
Cutting the grill hole

Now use a large drill to make a pilot hole for your jigsaw blade. Keep the hole away from the edge by about 1/4". Use a jig saw with a blade that is suitable in length to cut out the grill hole. Leave about 3/16" of material all the way around the outside edge. Do not use the router bit to actually cut the hole. The supplied router bit is only for trimming the grill hole flush to the router template.
There are several different types of tools that can be used to rough cut the grill hole.
- Oscillating tool
- Roto Zip
- Jigsaw with long blade
- Air Saw
Routing a perfect grill hole
Use the supplied flush trim router bit with a hand held router to finish out the hole. Warning!: be sure that the bit height is properly set so that the bearing of the bit meets with the inside square template. Carefully check that the bearing will make proper contact with the template at all points around the opening. The shock channel is deeper towards the bottom of the bag. So Check this twice!

Double check that the Allen Set Screw is Tight Before Using

Once everything is set, it's a good idea to clamp the bag to your workbench or have a second person assist you by holding the bag. Wear safety glasses! Route the hole out.
STEP 8
Putting the grill in place
Now all the hard work is done!
Remove the square template Remove the woofer mounts and the supplied double sided mounting tape to adhere the grill in place.

Take time to center the grill and position the tape so that the tape is not visible through the hole. Tip: The supplied mounting tape is seriously strong stuff. properly clean the area of the bag that will make contact with the tape. make sure you position the grill right the first time; you might not easily get it back off!
Use the supplied thick foam gasket around the grill opening on the bag. Use the supplied foam gasket to pad the woofer mount along all surfaces that will come in contact with the bag.

STEP 10
Mounting your woofer
Use the supplied gasket on the front of the woofer. Be sure not to block the screw holes.

Use the 8 supplied 1-1/4" long screws to fasten the woofer down to the mount.
Note: When taking the woofer in and out of the bag for service it is much easier to remove the entire mount and woofer as an assembly and then take the woofer on or off the mount rather than attempting to screw the woofer in place after the mount is in the bag. This mounting system has been intentionally designed to be easily serviceable. Don't kill yourself doing it the hard way.
Mount the Mount
Place the mount back into the bag and thread in all fasteners. Note that there are two different size fasteners. there are six 1" long screws and one 2' long screw. The two inch long screw is used at the front of the mount. Use the supplied rubber backed stainless washers on all 7 mounting screws to protect the bag paint and to increase the clamping surface area.

Front Mounting Point

The picture above shows how the hardware should be arranged at the forwardmost mounting point. Looking down into the bag at the mounting point that is located at the front of the bag. This fastener uses an aluminum spacer and two washers on the inside of the bag and a third washer on the outside (painted side) of the bag not seen in this picture. Notice that there is one washer that goes on before the aluminum spacer and another after the aluminum washer. Both with the rubber facing the woofer mount.
When screwing the mount in place it is easiest to start with the front mounting point and then move on to the remaining 6 mounting points in the rear one at a time. If you have a pick tool with a 1/8" shaft at your disposal it makes finding the holes in the woofer mount and lining everything up a little easier. This can also be done without a pick tool. In either case you want to get all of the screws started and then tighten it all down evenly. Afterwards use a flashlight to make sure that the gasket around the grill has made a complete seal all the way around the grill opening. If there are any unexpected gaps, remove the mount and add a second layer of gasket to the problem area. As long as the bag was cut correctly this should not be a required step.
STEP 12

Time to Tune
Very Important Settings!
In order to get the most out of your subwoofer system and not void the warranty on Velocity subwoofers the following settings must be applied. Failure to follow these instructions will lead to a poor performing system and quickly lead to overheating the voice coil.
- Amplifier crossover must be set to HighPass (not LowPass) at 45hz.
- Lowpass. Optionally you can use a DSR1 sound processor to LowPass the subwoofers at 400hz. A LowPass crossover is optional and not required. The Velocity subwoofers are engineered to naturally roll off at higher frequencies all on their own.
- Bike's radio must be flashed, or a DSR1 processor must be used with an American Hard Bag tune (free and available here).
- Do not add any bass boost using the radio tone controls, EQ, or an external DSP. Allow the woofers to take advantage of their natural response.
- Set amplifier sensitivity (gain) to minimum on subwoofer channels and tune the entire rest of the system. This includes gain, EQ, and phase.
- Only after the rest of the system has been optimized and screaming loud then set the subwoofer sensitivity (gain) to match and compliment the other speakers.
Phase Matching Subwoofers
There are two kinds of phase with regards to speakers. Electrical phase, which is how the speakers are wired (positive and negative), and then there is Acoustic phase. Acoustic phase is the direction the cone is actually moving in relation to other speakers in the system in the real world and in real time. The DSR1 has a magical feature that allows you to change (invert) the phase of any speaker in the system instantly. The cool thing is that you don't have to have any special equipment other than the DSR1 to optimize phase and make your system come to life. Simply invert the speaker phase of the subwoofers and lid speakers and see what combination sounds the best.

Above is a screenshot of the phase feature on the DSR1 app
- The red finger is pointing towards the channel being adjusted.
- The blue finger is pointing towards the state of phase (in phase).
- The yellow finger is pointing to the phase after switching to out of phase.
- The slider in the middle is a fine adjustment that should only be used by advanced users. It's not necessary to use the fine adjustment to get bass. The fine adjustment is more for adjusting high frequencies.
You can find the phase shift feature on the "Time Alignment" tab in "Advanced Tune".
Always start by phase matching the subwoofers to your lid speakers. Velocity, Hertz, and Hybrid Technologies Lid speakers can share the same air space as the Velocity subwoofers without any ill effects. We made sure to engineer these so that they play well in a saddlebag as an enclosure and with those lid speakers.
Why Do I Need to Mess With Phase Alignment if I Wired the Entire System Correctly?
The reason for this is that small amounts of delay (milliseconds) are introduced into the audio signal whenever tone controls, EQ, or crossovers are used. These delays cause phase shifts and amount to the speakers becoming out of sync with each other. The good thing though is that these phase shifts are always equal from left to right since all tone, EQ, and crossover settings are always the same on a bike. So you don't have to worry about phase aligning from left to right. Only from pair to pair of speakers. When done correctly all speakers will be moving all in the same direction at the same time and the difference in bass output and sound quality over the entire spectrum is profound.
You can find a detailed article on how this is done here.
Here is a list in order of where people generally go wrong.
- Not setting the subwoofer crossovers as this article states. This isn't your car.
- Not setting the subwoofer sensitivity last.
- Not phase matching your subwoofers and not phase matching your lid speakers to your subwoofers.
- Not using our recommended lid speakers. We engineered the Velocity subwoofers to play especially well with many lid speakers but some lid speakers just don't have enough power or suspension to deal with the added pressures inside the bag. All Velocity R690 based lid speakers we sell work especially well. You can find all of our R690 based lid speaker solutions here.