

Why Your Harley's Factory Radio Is Holding You Back
A harley radio navigation upgrade is one of the most impactful changes you can make to your touring bike. Here's a quick look at your best options:
| Upgrade Type | Best For | Price Range |
|---|---|---|
| OEM Boom! Box 6.5GT | Factory fit, plug-and-play | ~$500-$800 |
| Soundstream Reserve V2 | CarPlay, Android Auto, built-in GPS | ~$800-$1,200 |
| Diamond Audio 7" Head Unit | Balanced audio + navigation | ~$600-$1,000 |
| Power Acoustik HD-14KIT | Budget-friendly CarPlay + GPS | ~$300-$500 |
| Carpuride W702H | Add-on GPS for non-touring models | ~$150-$250 |
Most factory Harley radios have two big problems: weak signal output that can't properly drive speakers or amplifiers, and no Apple CarPlay or Android Auto. That means no real-time traffic, no turn-by-turn directions, and no easy hands-free control — frustrating on a long tour.
And it's not just about music. Road networks change by roughly 2.7 million updates every single day worldwide. Riding with outdated maps isn't just inconvenient — it can send you the wrong way on an unfamiliar road.
The good news: today's aftermarket head units solve all of this with plug-and-play installation, built-in GPS, and wireless smartphone integration — without gutting your bike's wiring.
At American Hard Bag, we've spent years helping Harley owners build complete, road-ready setups — from hard bags to audio integration — and we know how the right harley radio navigation upgrade transforms a touring bike. This guide will walk you through everything you need to choose, install, and get the most out of your upgrade.
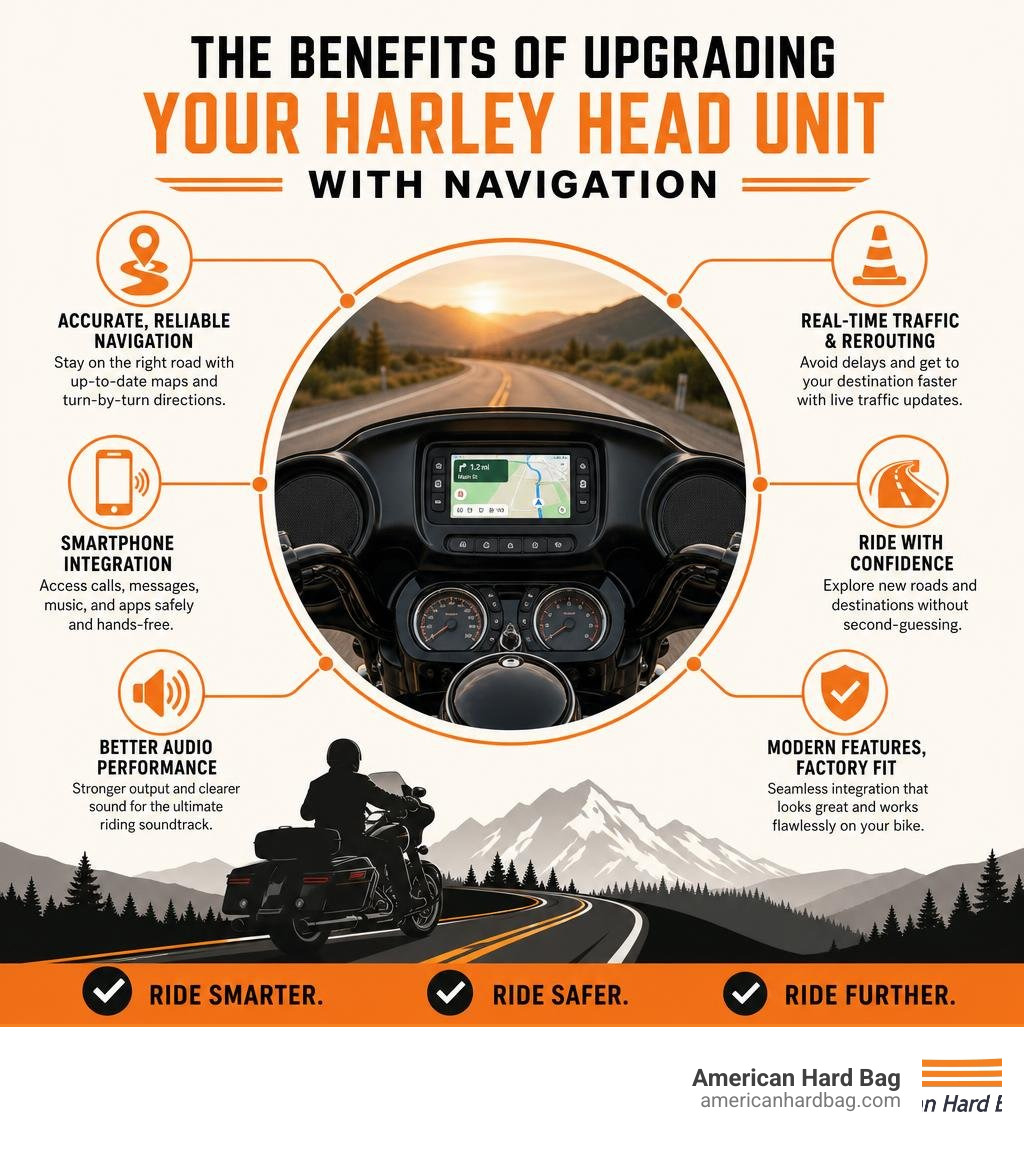
Why Consider a Harley Radio Navigation Upgrade?
When you are out on the open highway, the last thing you want to worry about is whether your GPS is lying to you. Because the global road network receives approximately 2.7 million daily updates, map accuracy is vital. If your navigation system is running on five-year-old factory software, you are missing out on new highways, updated points of interest (POIs) like gas stations and dealerships, and real-time traffic rerouting.
Beyond maps, upgrading your head unit is the actual foundation of any quality motorcycle audio system. If you try to build a high-performance audio setup on top of a weak factory radio, you will run into massive roadblocks. To understand how your motorcycle's audio system operates as a cohesive unit, check out our guide on Understanding Harley Davidson Audio from Factory Systems to Custom Setups.
Overcoming Factory Radio Limitations with a Harley Radio Navigation Upgrade
The single biggest limitation of factory Harley-Davidson radios is their weak signal output. Simply put, they do not send a strong or clean enough audio signal to properly drive aftermarket amplifiers and speakers. When you turn up the volume to overcome wind and engine noise at highway speeds, a factory radio introduces harsh audio distortion.
Furthermore, factory systems offer extremely limited system expandability. They lack dedicated low-voltage pre-amp outputs (RCA outputs), making it incredibly difficult to connect high-power external amplifiers. By executing a harley radio navigation upgrade, you replace that weak link with a high-voltage, clean source unit that allows your entire audio system to scale.
Key Benefits of Modern GPS and Smartphone Integration
Modern aftermarket head units bring your Harley's dashboard straight into the modern era. Here is what you gain:
- Wireless Connectivity: No more fumbling with wet USB cords. Your phone automatically pairs via Bluetooth 5.0 or Wi-Fi as soon as you turn the key.
- Real-Time Navigation: Use Apple Maps, Google Maps, or Waze for real-time traffic updates, hazard warnings, and police alerts.
- Turn-by-Turn Directions: Clear, easy-to-follow visual and audio prompts delivered directly to your fairing speakers or your wireless helmet headset.
- Hands-Free Control: Fully integrated voice recognition (Siri or Google Assistant) allows you to change tracks, make phone calls, or set a new destination without taking your hands off the handlebars.
Comparing OEM Boom! Box Updates vs. Aftermarket Solutions
When looking to upgrade, you generally have two paths: update your existing OEM Boom! Box system or swap it out entirely for an aftermarket multimedia head unit.
| Feature | OEM Boom! Box 6.5GT / GTS | Aftermarket Navigation Head Units |
|---|---|---|
| Primary Navigation | Built-in offline GPS (Naviextras) | Wireless Apple CarPlay, Android Auto, & Built-in GPS |
| Map Updates | Manual USB transfer (often paid) | Automatic via smartphone or free software updates |
| Signal Output | Weak, highly equalized factory signal | Clean, high-voltage RCA pre-outs (up to 4V) |
| Display Brightness | Good, standard daylight visibility | Ultra-bright (up to 1000 NITs), optically bonded LCDs |
| Glove Friendliness | Moderate responsiveness | High-sensitivity capacitive touchscreens |
| Water Resistance | Excellent (OEM standard) | Highly weather-resistant (IPx5 to IP67 ratings) |
Before making a decision, it helps to understand how the factory radio interacts with the motorcycle's wider electrical architecture. For details on how Harley structured these systems from the factory, read up on the Factory Harley Radio Integration Secrets for 2014.
Official Harley-Davidson Navigation Options
If you prefer to keep your bike 100% original, the official Boom! Box 6.5GT Radio Kit - Domestic is a direct, factory-supported upgrade path for riders moving up from the smaller Boom! Box 4.3 screen. For newer models, the Harley-Davidson Embedded Navigation system provides reliable offline GPS mapping that does not rely on cellular service.
OEM units excel at weatherproofing and feature automatic volume control, which smoothly raises and lowers your music volume to compensate for wind noise as your speed changes. However, keeping these maps updated can be a slow, manual process that requires downloading software to a computer and transferring files via a USB drive.
Choosing an Aftermarket Harley Radio Navigation Upgrade
If you want the absolute best in modern technology, an aftermarket harley radio navigation upgrade is the way to go. Premium units from brands like Diamond Audio or Soundstream offer beautiful, high-definition capacitive touchscreens with up to 1000 NITs of brightness, making them readable even in direct California sunlight.
These systems are built with IPx5 or IP67 water-resistance ratings to handle heavy rainstorms, and they feature glove-friendly screens so you do not have to pull over just to zoom in on a map. Alternatively, if you ride a Softail, Sportster, or another model without a massive fairing, you can use a handlebar-mounted system like the Carpuride mount system to add wireless CarPlay and navigation to your handlebars in minutes.
Compatibility and System Requirements Across Harley Models
Finding the right head unit depends heavily on your bike’s model year and fairing style.
To ensure your upgraded system works seamlessly with your amplifiers and speakers, you will also want to make sure your radio is flashed correctly. You can learn more about this in our Ultimate Harley Radio Flash Guide for Aftermarket Speakers and Amplifiers.
Fitment for 1998-2013 Harley-Davidson Motorcycles
For older Touring models (Road Glide with the sharknose fairing or Street Glide with the batwing fairing), retrofitting a touch-screen navigation system requires specific wiring adapters and mounting brackets. Because these bikes do not have modern digital data networks, you must use specialized handlebar control integration modules to keep your thumb controls working. Fortunately, plug-and-play bundles are readily available that adapt modern double-DIN style screens to these classic fairings without requiring any permanent cutting or splicing.
Fitment for 2014-2026 Harley-Davidson Motorcycles
Modern Harleys utilize a complex CANBUS digital data system. To successfully install an aftermarket radio on a 2014 or newer Touring bike, you must use an integration module like the iDataLink Maestro RR.
This smart module acts as a translator between your Harley’s computer and your new radio. Not only does it preserve your factory handlebar controls, but it also allows your new screen to display real-time vehicle diagnostics, engine temp, battery voltage, and even tire pressure monitoring system (TPMS) data right on the screen. Premium aftermarket kits come with completely pre-wired, plug-and-play harnesses that plug directly into your factory radio connector.
Step-by-Step Installation Guide for Harley Navigation Systems
Ready to tackle the install? Don't worry — modern plug-and-play kits make this incredibly straightforward. Before you begin, gather your basic hand tools (T25 and T27 Torx drivers, socket set, and zip ties) and make sure to pull your motorcycle's main fuse to protect the electrical system.
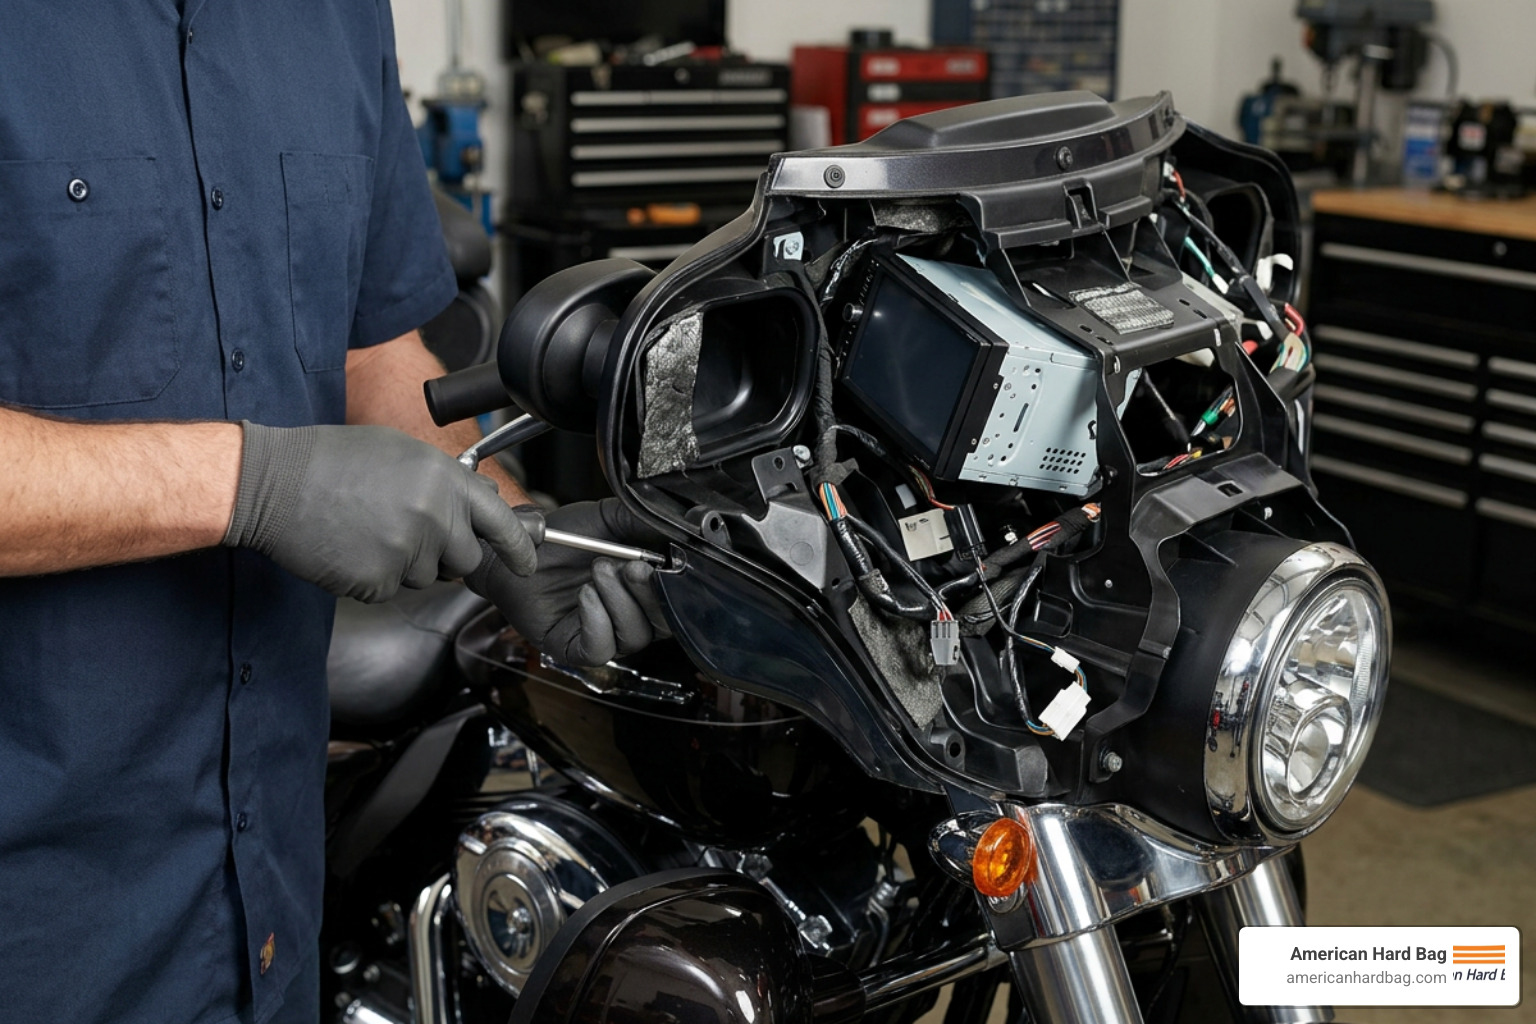
If you are planning on adding an external amplifier during this process, make sure you have the right connection accessories. Check out our Harley Plug Play Speaker to RCA Kit to simplify your wiring.
Hardware Mounting and Wiring Connections
When installing GPS components, proper module placement and routing are essential to avoid interference:
- Remove the Outer Fairing: Carefully remove the windshield and fairing bolts, making sure to support the outer fairing so it doesn't drop.
- Mount the GPS Antenna: For kits like the Advanced Audio GPS Navigation Kit, place the GPS antenna on top of the radio bracket inside the fairing. Clean the mounting surface with alcohol, press the antenna down firmly for 60 seconds, and ensure it has a clear, unobstructed line of sight to the sky through the plastic outer fairing.
- Route the Harnesses: Secure all wiring with cable ties to prevent rubbing against sharp metal brackets. If you are adding a Boom! Audio Navigation Interface Module Kit, plug the module securely into the designated radio ports.
- Manage Electrical Load: That a dedicated GPS module requires up to 400 milliamps of additional current from your electrical system, and the Navigation Interface Module (NIM) requires up to 30 milliamps. Ensure your battery and charging system are in healthy condition.
- Torque to Spec: When securing brackets, use proper torque specifications to prevent things from rattling loose. Tighten antenna bracket screws to 20-30 in-lbs for FLH (Street Glide) models, and 35-45 in-lbs for FLT (Road Glide) models.
Software Setup and System Flashing
Once the hardware is bolted in, the job isn't quite done. Many aftermarket radios require a quick firmware update via USB before first use. Additionally, if you are integrating with a factory amplifier system, you may need to program your integration module (like the iDataLink Maestro) on a computer to map your handlebar controls. System validation is simple: power on the bike, check that the GPS acquires a satellite signal, and verify that your thumb controls operate the volume, track skip, and voice command functions correctly.
Real-World Performance, Costs, and Expectations
How do these upgrades perform when you are actually riding? On the highway at 80 mph, wind and engine noise are brutal. To get the most out of your navigation prompts and music, you need power.
According to seasoned riders on forums like Road Glide Forums, your front fairing speakers deliver about 90% of the audible sound you hear while riding. While rear lid speakers are great for parking lot hangouts, physics works against them at highway speeds. Investing your budget into a high-quality head unit and a strong front-stage amplifier is the smartest route.
For a complete breakdown of what to expect when upgrading your entire system, read our Best Harley Davidson Radio Upgrade Guide.
In terms of costs, a quality harley radio navigation upgrade typically breaks down as follows:
- Entry-Level / Add-On Systems: $150 - $400 (Great for basic wireless CarPlay setups)
- Premium Plug-and-Play Head Units: $600 - $1,200 (Units with built-in maps, high-brightness displays, and integration modules)
- Professional Installation: $150 - $400 (If you prefer to have an expert shop handle the fairing removal and wiring)
Frequently Asked Questions About Harley Navigation Upgrades
Can I install a Harley radio navigation upgrade myself?
Absolutely! If you can use a screwdriver and a socket wrench, you can install a modern plug-and-play kit. Today's aftermarket kits feature pre-wired harnesses that match your factory plugs perfectly — no wire stripping, soldering, or electrical tape required. However, if you are adding multiple amplifiers, custom speakers, or complex lighting, reaching out to a professional installer is always a safe bet.
Will upgrading my radio void my motorcycle's warranty?
No. In the United States, the Magnuson-Moss Warranty Act protects consumers. A dealership cannot void your motorcycle's warranty simply because you installed an aftermarket radio. The only exception is if the aftermarket part directly causes damage to the electrical system (e.g., if you hacked up the factory harness). By using plug-and-play kits that preserve your OEM wiring, you can easily revert the bike back to stock at any time without leaving a trace.
How do I update the maps on my upgraded navigation system?
If you go the OEM route, you can manage and purchase map updates using the official Harley-Davidson - Update your Boom!™ Box Navigation portal. However, many riders find the map subscription fees frustrating, leading to common community complaints like $150 to update maps? Are they Crazy.
With an aftermarket CarPlay or Android Auto head unit, this frustration disappears entirely. Your maps update automatically and for free through your smartphone, meaning you always have access to the latest road changes and POIs without ever paying a subscription fee.
Conclusion
Upgrading your Harley-Davidson’s radio and navigation system is the single best way to bring modern convenience, safety, and audio quality to your rides. Whether you choose to stick with a factory-style upgrade or swap to an ultra-bright, feature-packed aftermarket head unit, getting rid of that limiting factory radio is a game-changer.
At American Hard Bag, we specialize in helping riders design scalable, high-performance audio systems that stand up to the rigors of the road. If you are ready to take your touring machine to the next level, dive into The Ultimate Guide to Upgrading Your Harley Davidsons Audio System and let us help you build the perfect setup for your next adventure!