

Why Your Motorcycle Audio Upgrade Matters at Highway Speeds
A motorcycle audio upgrade is one of the most rewarding changes you can make to your bike — but it's also one of the most confusing to get right.
Here's a quick overview of your main options:
| Upgrade Type | Best For | Typical Cost Range |
|---|---|---|
| Plug-and-play kit | Beginners, Harley-Davidson owners | $500 - $2,000 |
| Full-system upgrade | Serious audio enthusiasts | $2,000 - $5,000+ |
| Individual components | Riders upgrading piece by piece | $100 - $1,500 per part |
| Custom setup | Maximum performance, unique builds | $3,000 - $8,000+ |
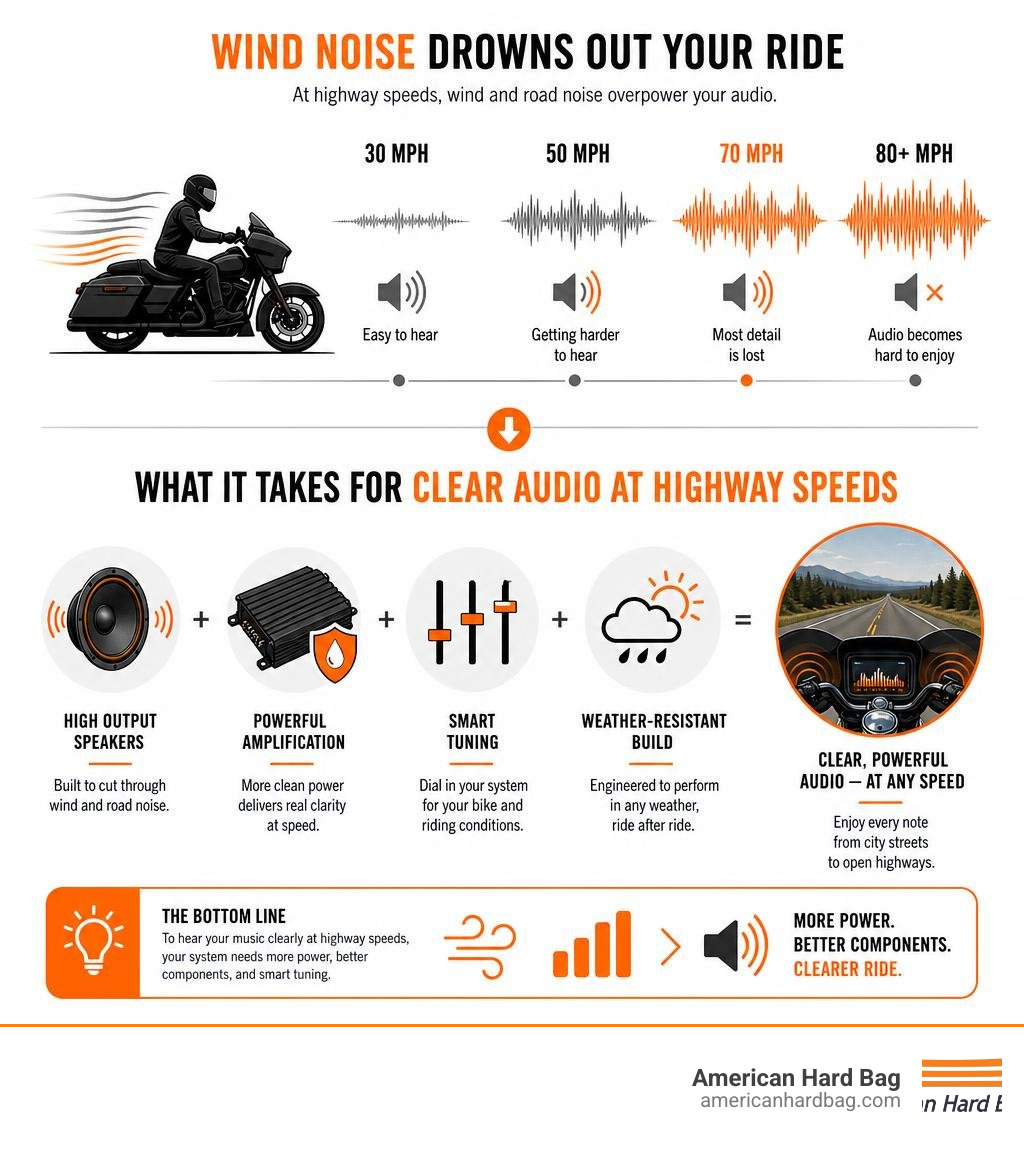
The core problem: Factory motorcycle speakers were not designed for highway speeds. At 70 mph, wind, road, and exhaust noise can drown out even a maxed-out factory system. Many riders end up pushing their stock speakers past their limits just trying to hear anything — and then blow them out entirely.
Modern aftermarket systems solve this with higher wattage, weather-resistant components, and smarter amplification. Premium setups can deliver 800 to 1,200 watts RMS — enough to deliver clear, full sound even at highway speeds.
Whether you're frustrated with a system you can't hear on the open road, confused by wiring harnesses and impedance ratings, or just trying to figure out where to start — this guide breaks it all down in plain language.
At American Hard Bag, we're a US-based manufacturer of premium motorcycle accessories with deep expertise in helping riders find the right motorcycle audio upgrade for their specific bike and riding style. Our experience building durable, rider-focused products gives us a practical perspective on what actually works on the road — and we'll share that with you throughout this guide.
Anatomy of a Motorcycle Audio System
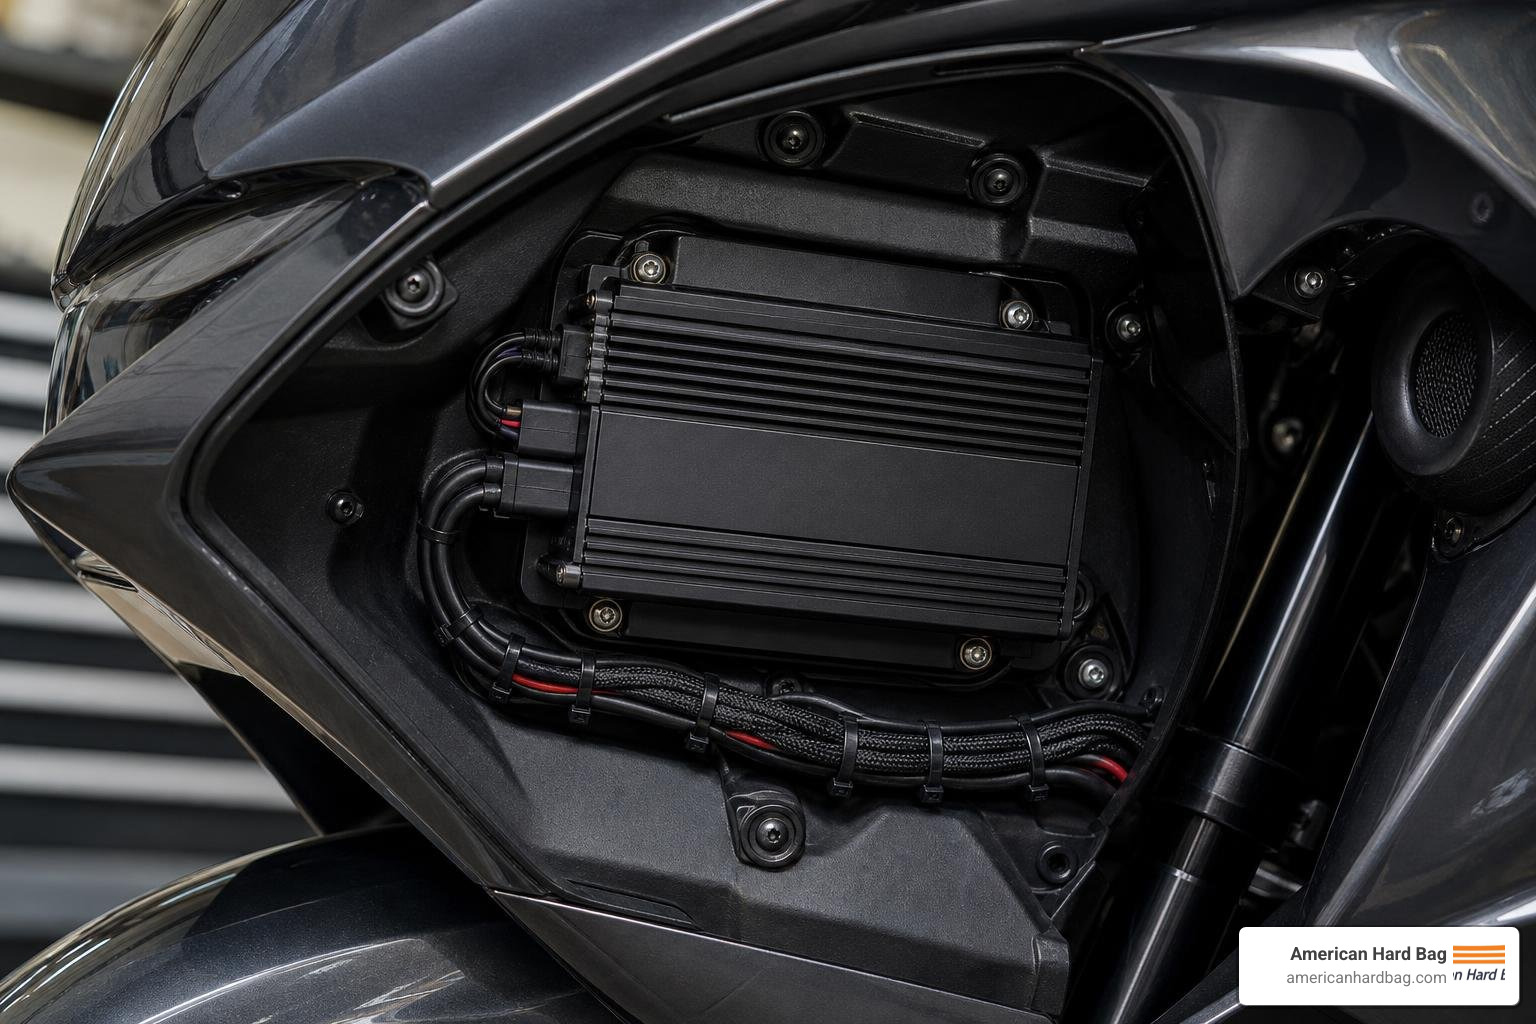
To get the most out of your upgrade, it helps to understand how the different components of your audio system work together. Think of your audio system as a team where every player has a highly specialized role:
- The Head Unit (The Brain): This is your radio or receiver. It reads your music files, connects to your phone, and sends the initial audio signal down the line.
- The Amplifier (The Muscle): The signal from your head unit is actually very weak. The amplifier takes this weak signal and boosts its electrical power so it can drive your speakers. Without an amp, even the best speakers in the world will sound quiet and thin.
- The Speakers (The Voice): Speakers convert the electrical power from the amp into physical air vibrations (sound). On a motorcycle, these are usually mounted in the fairing, lower fairings, or saddlebag lids.
- The Subwoofer (The Heartbeat): Subwoofers handle the lowest bass frequencies. While hard to execute on a motorcycle due to open-air acoustics, saddlebag-mounted subwoofers have become incredibly popular for adding that deep, physical punch you can feel in your chest.
When these components are properly matched, they distribute power efficiently without overheating or distorting. A weak link in this chain—such as high-end speakers paired with a weak factory head unit and no amplifier—will ruin the performance of the entire system.
Choosing the Right Head Unit for Your Motorcycle Audio Upgrade
Your head unit is your primary point of contact with your music. When planning your motorcycle audio upgrade, look for a receiver that is designed specifically for the rugged demands of riding in 2026.
The best modern head units offer seamless wireless Apple CarPlay and Android Auto. This allows you to keep your phone safely tucked away in your pocket while accessing your favorite navigation apps, streaming playlists, and contacts directly on your dash.
Additionally, look for features like built-in GPS navigation (crucial for areas with poor cell service), SiriusXM compatibility, and physical, glove-friendly buttons. Most importantly, your new head unit must integrate perfectly with your existing handlebar controls so you can adjust the volume or skip tracks without ever taking your hands off the grips. If you are browsing premium head units and installation accessories, make sure to choose high-quality options designed specifically for the motorcycle environment.
Speakers, Amplifiers, and Subwoofers: The Power Trio
If the head unit is the brain, the speakers, amp, and subwoofer are the brute force. When selecting these components, you will constantly see two terms: wattage and impedance.
- Wattage (RMS vs. Peak): Always ignore "Peak" or "Max" wattage ratings—these are marketing fluff. Focus entirely on RMS wattage, which measures the continuous power an amplifier can output or a speaker can handle safely over long periods.
- Impedance (Ohms): This is the measure of electrical resistance. Most factory motorcycle systems run on 2-ohm systems, while many aftermarket car audio components run on 4-ohm configurations.
Matching your speaker impedance to your amplifier's capabilities is absolutely critical. If you connect 2-ohm speakers to an amplifier that is only rated for 4-ohm loads, the amp will draw too much current, overheat, and likely shut down or burn out. Conversely, running 4-ohm speakers on an amp designed for 2 ohms will result in a safe but significantly quieter system.
To make sure you get the math right, take a look at our detailed guide on How to Choose the Right Amplifier for Your Harleys Sound System.
What Makes Motorcycle Audio Different from Car or Home Audio?
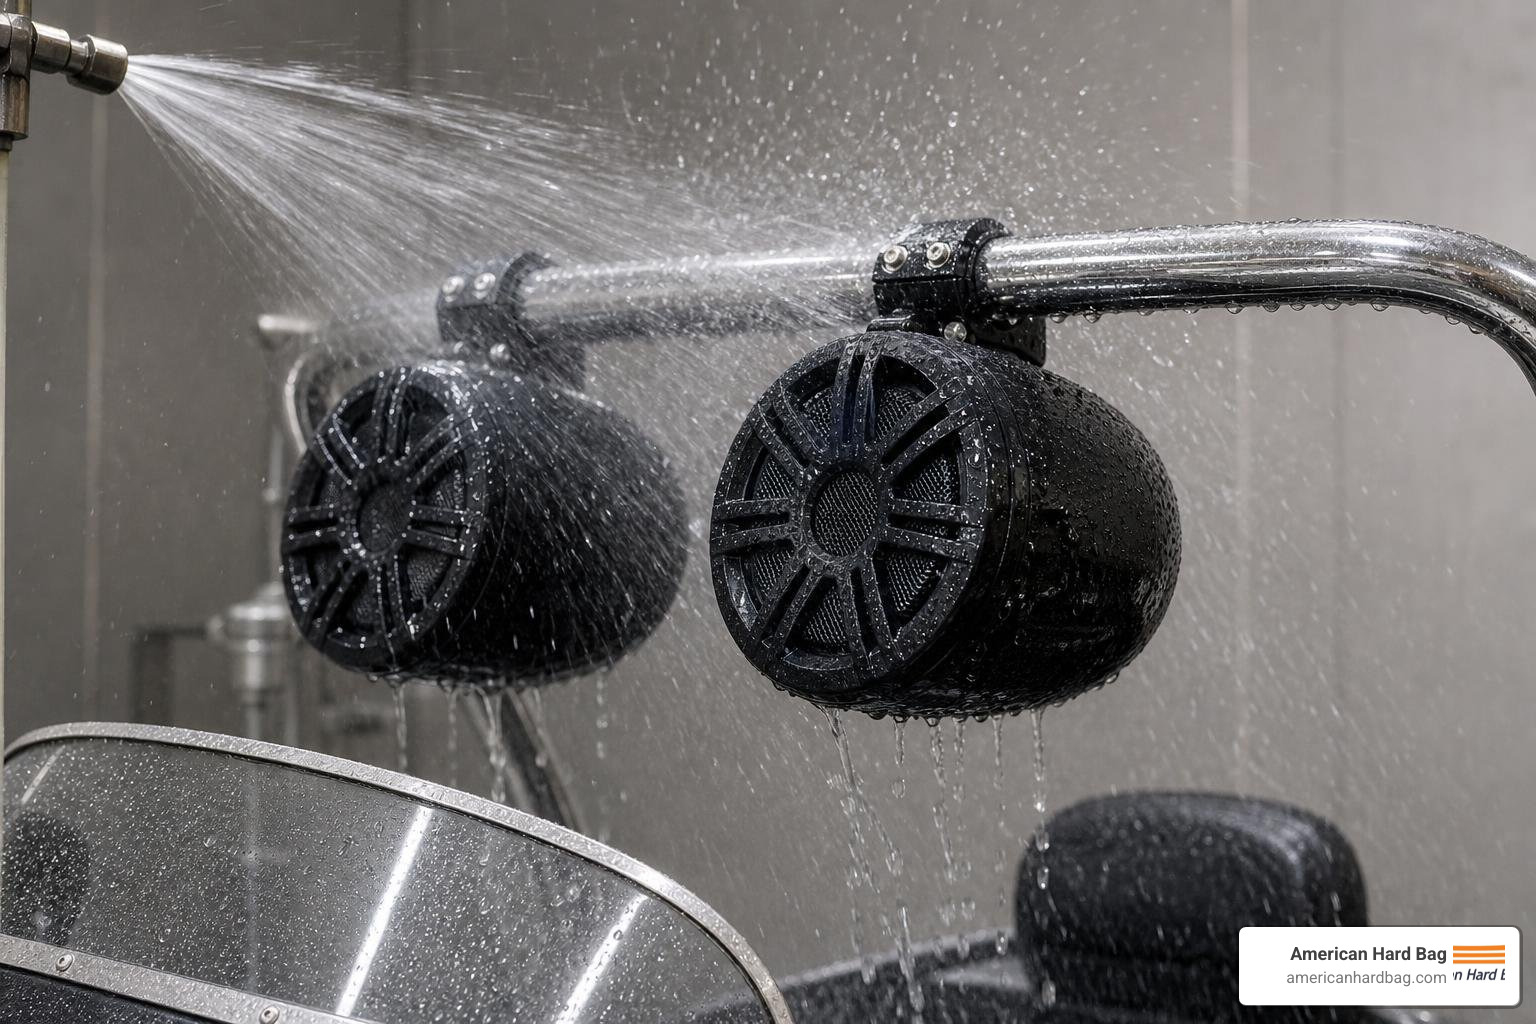
A common mistake riders make is buying cheap car audio equipment and trying to install it on their bike. While a car speaker might work great inside a sealed, climate-controlled cabin, it will quickly fail on a motorcycle.
Motorcycle audio systems must be engineered from the ground up for open-air environments. They face three major enemies:
- Water and Weather: Rain, road spray, morning dew, and pressure washing will ruin standard car speakers. True motorcycle speakers carry an IP67 rating or are built to marine-grade standards. This means they are completely sealed against dust and can handle heavy rain or direct splashes without water penetrating the delicate voice coils or paper cones.
- Violent Vibrations: Motorcycles—especially large V-twins—vibrate constantly. This vibration will rattle standard car stereo brackets loose and crack cheap solder joints on circuit boards. Motorcycle-specific amplifiers and brackets are ruggedized with potted circuit boards, secure locking harnesses, and heavy-duty mounting plates.
- The Acoustic Void: In a car, sound waves bounce off the glass and plastic interior, creating a pressurized cabin that naturally enhances bass. On a motorcycle, there are no walls. The moment sound leaves your speakers, it escapes into the open air. Because of this, motorcycle speakers must use high-efficiency horn tweeters and specialized cone materials to project sound directly at the rider's ears rather than letting it scatter.
If you are looking for local professional guidance on weathering and vibration protection in Northern California, checking out resources like THE BEST 10 CAR STEREO INSTALLATION IN ROCKLIN, CA - Yelp can connect you with regional experts who understand these unique environmental challenges.
Planning Your Motorcycle Audio Upgrade: System Types and Configurations
How you plan your upgrade depends entirely on your budget, your bike's current setup, and how loud you want to go.
- Plug-and-Play Kits: These are complete, pre-configured packages that include speakers, an amplifier, mounting brackets, and pre-terminated wiring harnesses. They are designed to fit your exact bike model without any cutting, drilling, or splicing of your factory wiring.
- Individual Component Upgrades: If you want to build your system slowly, you can upgrade your fairing speakers first, add an amplifier later, and eventually install saddlebag speakers.
- Custom Setups: For the ultimate audio experience, custom setups allow you to mix and match high-end components, build custom fiberglass enclosures inside your saddlebags, and run massive multi-amp configurations.
To help you decide which path is right for you, we have put together a breakdown of The Top 3 Audio Upgrades Every Harley Owner Should Consider.
| Feature | Plug-and-Play Kits | Custom Audio Setups |
|---|---|---|
| Installation Time | Fast (typically under 5 hours) | Long (often 10+ hours) |
| Wiring Requirements | Factory-style connectors, no cutting | Custom routing, soldering, and crimping |
| Acoustic Tuning | Often pre-tuned for your specific bike | Requires manual DSP tuning and RTA setup |
| Reversibility | 100% reversible back to stock | Hard to reverse due to modifications |
Harley-Davidson Compatibility and Model-Specific Upgrades
Upgrading a Harley-Davidson requires close attention to the specific year and model of your bike. Harley has changed its fairing designs, mounting depths, and electrical architectures several times over the years.
For example, 1998-2013 Street Glide and Electra Glide models feature the classic Batwing fairing. These bikes use older, analog style wiring and have limited physical depth inside the fairing, meaning you need compact amplifiers and specialized speaker adapters to step up from the factory 5.25-inch speakers to louder 6.5-inch options.
On the other hand, 2014+ Touring models (Street Glide, Road Glide, Ultra) use the more modern Rushmore platform. These bikes feature digital infotainment systems (and the newer Skyline OS on 2024+ models) that require specialized integration modules. If you simply swap the speakers on these newer bikes without addressing the factory radio's pre-programmed EQ curve, your new system will sound harsh and distorted.
To understand how Harley's factory radio programming affects your upgrade path, read our deep dive on Understanding Harley Davidson Audio From Factory Systems to Custom Setups.
Overcoming Highway Noise with a Harley Motorcycle Audio Upgrade
To truly overcome wind and exhaust noise at highway speeds, your system needs clean, raw power. We recommend aiming for 800 to 1,200 watts RMS of total system power.
To achieve this level of output without adding massive weight to your front fairing, modern high-end systems utilize neodymium magnets in the speakers. Neodymium is a rare-earth element that is up to 35% lighter and 65% smaller than traditional heavy ferrite magnets, yet it delivers incredible motor strength and power handling.
For a closer look at how premium engineering overcomes the challenges of high-speed cruising, check out our article on 5 Reasons Why American Hard Bag Speakers Outperform the Competition.
Installation and Maintenance: DIY vs. Professional Setup
Once you have chosen your dream gear, you have to decide who is going to install it.
If you choose a high-quality plug-and-play kit, DIY installation is highly achievable for anyone comfortable with basic hand tools. Because these kits use factory-matching connectors, you won't have to cut into your bike's main wiring harness. However, if you are building a complex multi-amp system with custom fiberglass saddlebag lids, a professional install is highly recommended to ensure proper system tuning and electrical safety.
Before making your choice, weigh the pros and cons in our guide: DIY vs Professional Installation What You Need to Know About Upgrading Your Harleys Audio.
Frequently Asked Questions about Motorcycle Audio Upgrades
How many watts do I need to hear music at 70+ mph?
To get crystal-clear audio over wind, road, and helmet noise at highway speeds, you should aim for an amplifier that delivers at least 100 to 150 watts RMS per channel (with a total system power of 400 to 1,200 watts RMS depending on how many speakers you run). Anything less than 70 watts RMS per channel will struggle to stay clean and clear above 65 mph.
Are waterproof motorcycle speakers actually waterproof?
High-quality motorcycle speakers rated IP67 are completely dustproof and can withstand being submerged in up to one meter of water for 30 minutes. While they can easily handle heavy downpours and road spray, you should still avoid spraying high-pressure water directly into the speaker cones when washing your bike.
Do I need to flash my Harley-Davidson radio after an upgrade?
Yes, on 2014+ Harley-Davidson touring models, the factory radio has a built-in EQ curve designed to make cheap factory speakers sound acceptable at low speeds. When you install high-performance aftermarket speakers and amps, this factory EQ curve will cause severe distortion and can even damage your new equipment. Flashing your radio resets this EQ curve to a flat output, allowing your new system to perform exactly as intended.
Conclusion
Upgrading your motorcycle's sound system is the ultimate way to elevate your long-distance rides. By understanding the relationship between head units, amplifiers, and weather-resistant speakers, you can build a system that cuts through the wind and delivers your favorite soundtrack with absolute clarity.
At American Hard Bag, we specialize in designing and manufacturing premium, plug-and-play audio upgrades specifically tailored for Harley-Davidson Touring models. We engineered our systems right here in the USA to handle the brutal vibrations and weather of the open road, ensuring you get competition-grade sound that lasts.
Ready to transform your riding experience? Get started today by checking out The Ultimate Guide to Upgrading Your Harley Davidsons Audio System.