

Start Your Harley Touring Amplifier Install the Right Way
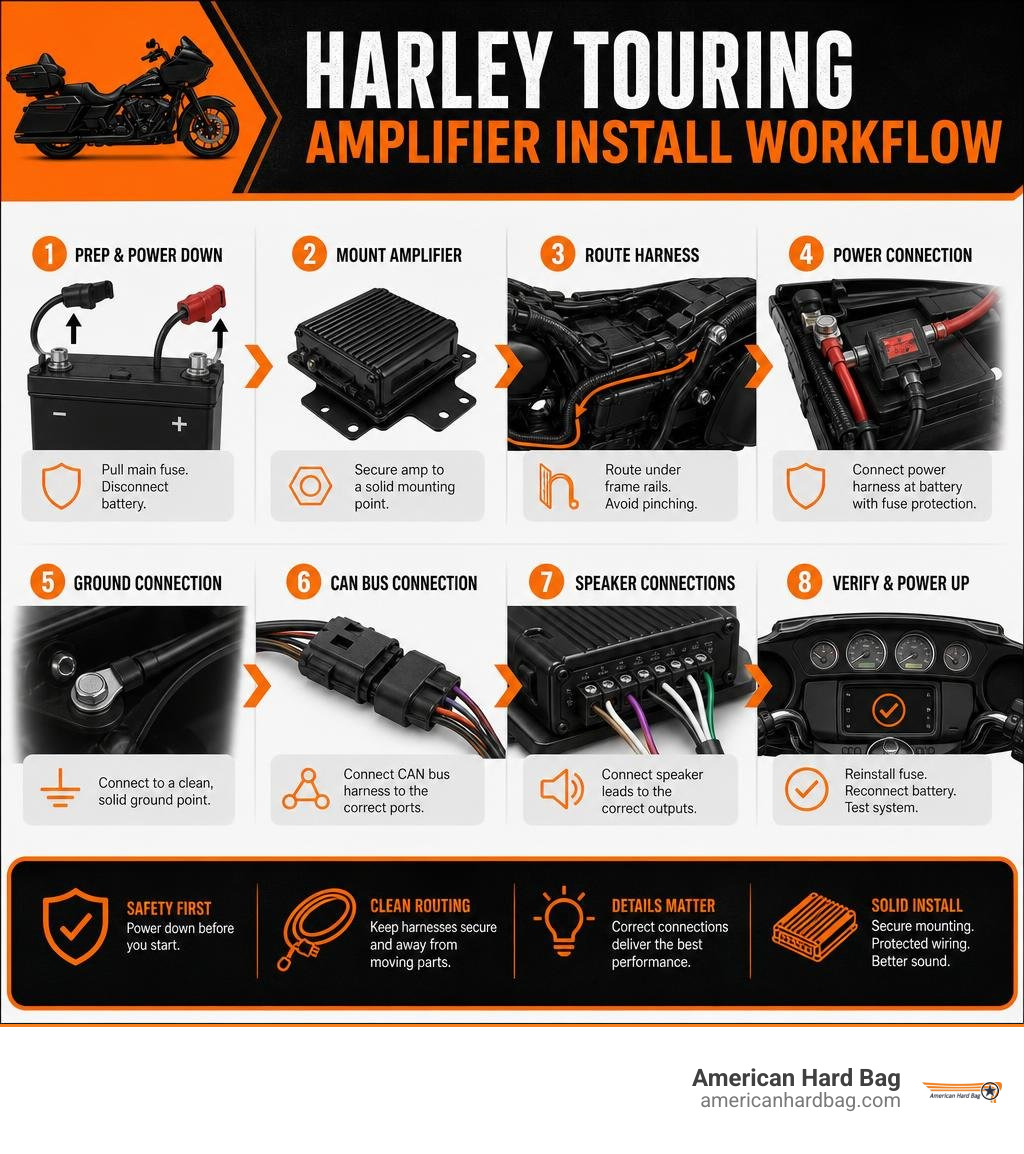
A successful Harley Touring amplifier install starts with the right mounting kit, a fuse-protected power harness connected at the battery, and a clean signal path kept away from spark plug wires. Disconnect the main fuse and battery first, mount the amp securely, route the harness under the frame rails without pinching it, then connect power, ground, CAN bus, and speaker leads for your exact system layout.
For OEM Boom! Audio Stage II Tour-Pak systems, the rear amplifier must follow installation of the primary fairing-mounted amp. It can add up to 8 amps of electrical demand, so confirm that your battery and charging system are healthy before adding accessories.
The details matter. Wrong CAN bus connections, loose grounds, mixed speaker stages, or skipping the required radio EQ update can lead to interference, protection faults, poor sound, or damaged speakers. This guide breaks the job into clear steps for fairing and Tour-Pak amplifier setups.
American Hard Bag builds durable motorcycle audio and hard-bag accessories for riders who want a cleaner, road-ready upgrade. Our experience with Harley Touring amplifier install components helps riders plan secure mounting, protected wiring, and practical system layouts before the first panel comes off.
Pre-Installation Prep and System Requirements
Taking the time to prep your workspace and motorcycle prevents accidental short circuits, blown fuses, and damaged body panels. Before turning a single bolt, set up a dedicated padded workspace or place soft microfiber blankets over your front fender, fuel tank, and rear saddlebags.
Safety comes first: always pull the main maxi-fuse and disconnect the battery terminals before touching your motorcycle's electrical system. Disconnecting the negative cable first prevents accidental grounding sparks if a tool touches the frame.
| Installation Spec | Fairing-Mounted Amplifier | Tour-Pak / Rear Amplifier |
|---|---|---|
| Typical Current Draw | Up to 8.0 Amps | Up to 8.0 Amps |
| Primary Location | Inner fairing bracket / Head unit tray | Under Tour-Pak / Support frame |
| Harness Routing Path | Fairing down through backbone channel | Backbone rail to right side cover & rear fender |
| Hole Drilling Required | None (uses factory mounting points) | 25 mm (1.0 in) hole in speaker pods for Stage II |
| Main Bracket Torque | 9.5–12.2 N·m (84–108 in-lbs) | 9.5–12.2 N·m (84–108 in-lbs) |
| Mounting Fastener Torque | 6.8–8.1 N·m (60–72 in-lbs) | 6.8–8.1 N·m (60–72 in-lbs) |
Electrical Load and Harley Touring Amplifier Install Prerequisites
Modern touring motorcycles carry robust charging systems, but adding high-output audio hardware demands careful power planning. A secondary rear amplifier adds up to 8 amps of additional continuous draw to your charging system. Adding handlebar-mounted cruiser amp setups introduces another 4.0 amps of current demand. If your bike is loaded with heated gear, auxiliary driving lights, and multiple high-output amps, an aging battery or weak stator can lead to voltage drops that throw amplifiers into protection mode.
When upgrading amplifiers for Harley models, inspect your battery health, clean all terminal posts, and ensure you have verified factory specifications outlined in official Harley-Davidson service documentation. Never mix Stage I and Stage II speakers on the same system, as their distinct crossovers, internal impedances, and power requirements will lead to signal cancellation and thermal failure.
Essential Tools and Fastener Torque Specifications
Having the right hand tools within reach makes the installation smooth and prevents stripped fasteners or cracked plastic fairings. Gather the following before you begin:
- Torx drivers (T25, T27, T30, T40)
- Hex/Allen bits and standard socket set (including 10mm and 7/16-inch)
- Step drill bit (capable of stepping up to 25 mm / 1.0 in for Tour-Pak pods)
- Torque wrench measuring in inch-pounds (in-lbs)
- Nylon wire ties and automotive cloth tesa tape
- Corrosion retardant or dielectric grease for electrical posts
Adhering strictly to torque specifications ensures vibration-proof mounting that won't back out at highway speeds:
- Amplifier-to-Bracket Screws: 9.5–12.2 N·m (84–108 in-lbs)
- Amplifier Mounting / Tour-Pak Support Screws: 6.8–8.1 N·m (60–72 in-lbs)
- Battery Terminal Hardware: 6.8–7.9 N·m (60–70 in-lbs)
- Electrical / ECM Caddy Fasteners: 8.1–10.8 N·m (72–96 in-lbs)
Step-by-Step Harley Touring Amplifier Install Guide
Begin bike disassembly systematically. Remove the main seat, side covers, and the main 50-amp maxi-fuse. Unscrew the ECM caddy fasteners (torqued from the factory at 8.1–10.8 N·m / 72–96 in-lbs) and shift the module to access the battery cavity. Remove the negative battery cable first, followed by the positive cable.
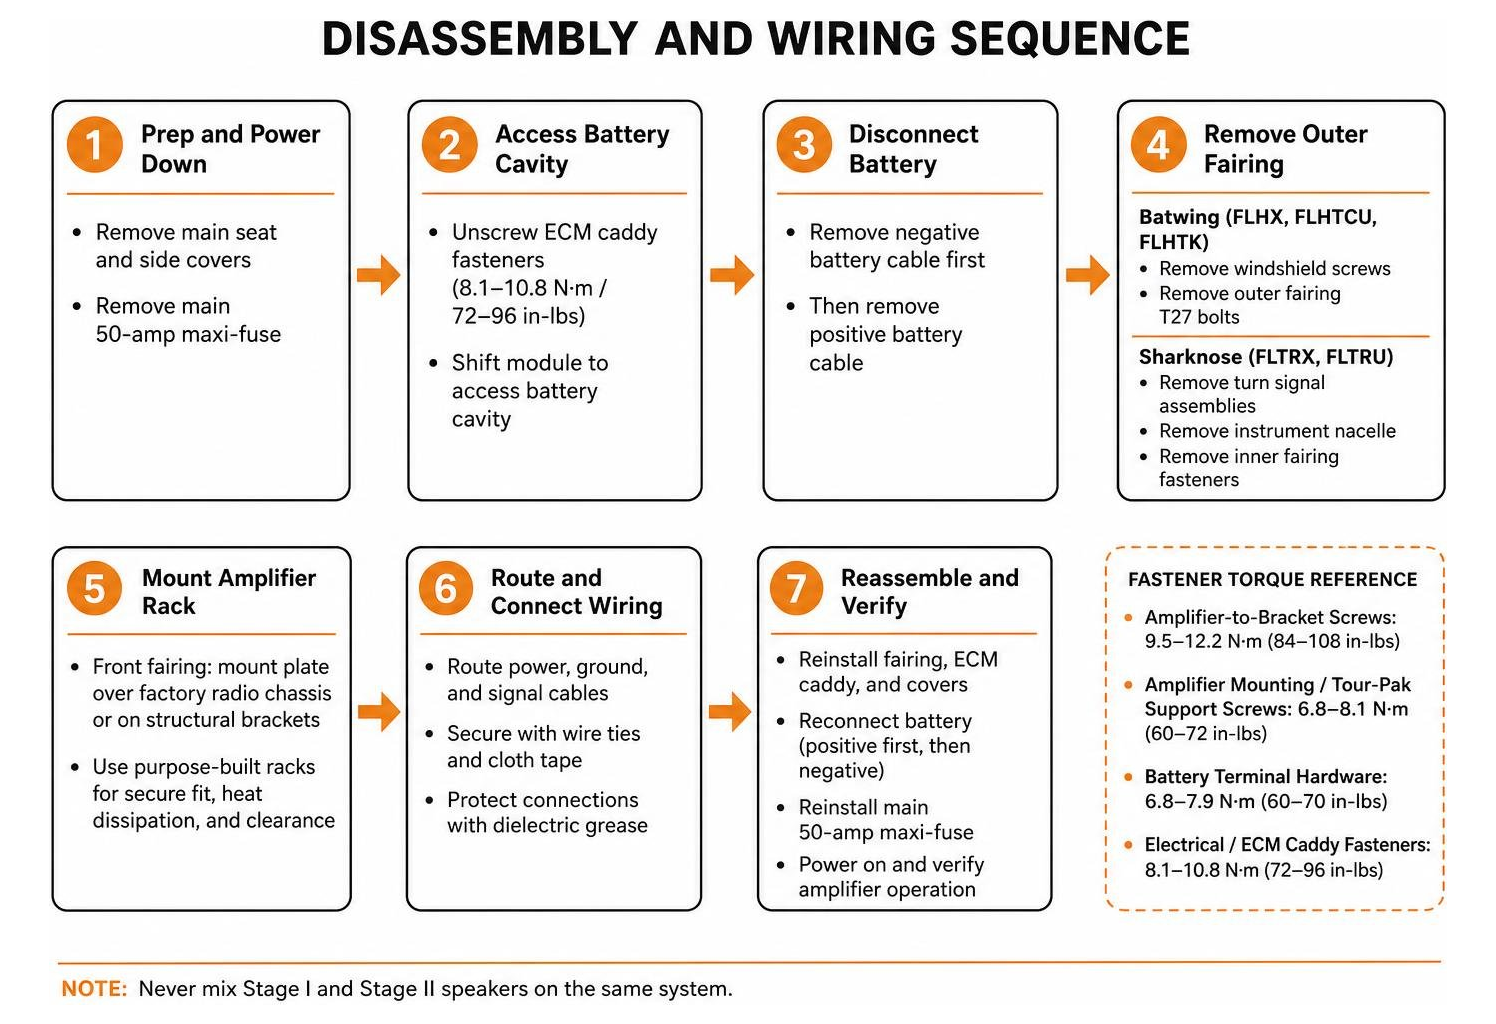
On Batwing fairing models (FLHX, FLHTCU, FLHTK), remove the windshield screws and outer fairing T27 bolts. On Sharknose models (FLTRX, FLTRU), remove the turn signal assemblies, instrument nacelle, and inner fairing fasteners to remove the outer fairing skin safely.
Mounting Fairing and Tour-Pak Amplifier Racks
For front fairing setups, position your mounting plate directly over the factory radio chassis or onto dedicated structural fairing brackets. Utilizing purpose-built Harley amplifier racks guarantees solid fitment, optimal heat dissipation, and ample clearance for gauge clusters and inner fairing bracing.
For Tour-Pak installations, remove the Tour-Pak interior liner and rear pods. If installing a Stage II configuration, use a step drill bit to drill a clean 25 mm (1.0 inch) pass-through hole in each speaker pod away from the factory wiring grommet. Deburr the plastic, install the protective rubber grommet, and secure the amplifier to its mounting brackets, torquing the bracket screws to 9.5–12.2 N·m (84–108 in-lbs). Slide the amp assembly over the protected rear fender into the Tour-Pak support tray, tightening the support bolts to 6.8–8.1 N·m (60–72 in-lbs).
Proper Wire Routing and Harness Connections for Harley Touring Amplifier Install
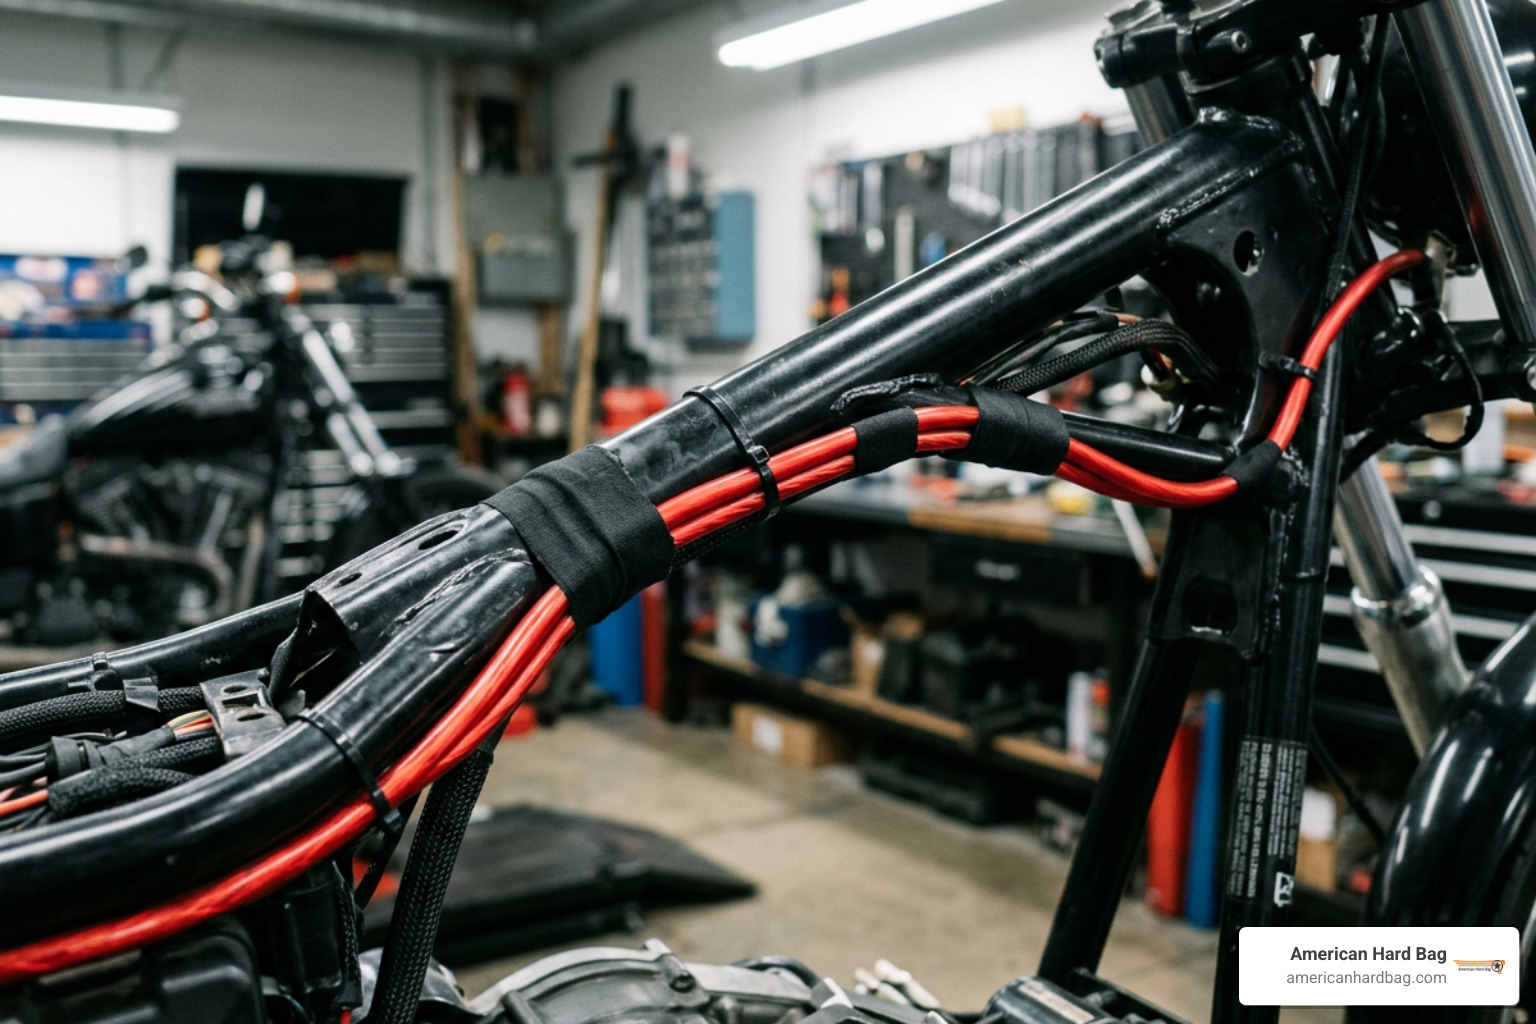
Routing power and audio signal wiring correctly is the difference between concert-level audio and an unlistenable engine-whine buzz. When routing high-current wiring from the battery to the fairing, run the power cable along the frame backbone under the fuel tank channel. Always separate high-current DC power cables from low-level audio input lines to eliminate electromagnetic interference (EMI).
For front fairing power, install a dedicated 8 gauge premium fairing mounted amp power harness with disconnect directly to the battery terminals with an inline fuse mounted within inches of the positive post. For bag-mounted audio, follow our detailed walkthrough on installing American Hard Bag Harley saddlebag amplifier wire harness assemblies.
Critical wiring best practices:
- Spark Plug Clearance: Keep all harness branches completely isolated from spark plug wires and ignition coils; high-voltage ignition pulses induce loud clicking noises into unshielded lines.
- Ground Separation: Keep audio system grounds on the battery negative terminal or dedicated clean frame ground studs. Never tie clean audio grounds into high-current motor grounds (like ABS pumps or starter grounds).
- Twisted-Pair Integrity: Never untwist factory or aftermarket signal lines beyond what is necessary for termination; twisted pairs reject induced noise.
Integrating CAN Bus and Multi-Amp Power Distribution
When running OEM Boom! Audio Stage II or smart aftermarket modules, the amplifier must communicate with the motorcycle's digital network. Under the right-side cover, locate the vehicle CAN bus connectors ([319A] and [319B]).
Connect connector [319A] from the kit harness into [319B] of the main motorcycle harness. If you are integrating a primary fairing amplifier with a secondary Tour-Pak amp, daisy-chain the CAN connectors in series. The final open connector in the chain must plug firmly back into the vehicle terminating resistor pack to maintain network bus impedance.
If you are expanding beyond factory limitations, an amplifier bypass harness lets you intercept clean preamp signals without hacking into your factory wiring harness. Always reference verified OEM service specifications when confirming pinouts and connector assignments across different model years.
Radio EQ Flashing, Gain Calibration, and Startup Pop Prevention
Once mechanical mounting and electrical connections are locked down, the audio system must be calibrated before you crank up the volume. Modern Harley factory head units (such as the Boom! Box 6.5GT and GTS) use internal digital signal processing that requires careful signal management.
Factory Radio Flash Requirements
From the factory, Harley-Davidson head units output an aggressive, non-linear equalization curve designed to push cheap factory speakers to their limit. If you power up a high-output amplifier and premium aftermarket speakers with this raw factory curve, the heavy bass boost and high-frequency spike will immediately distort, cause aggressive signal clipping, and destroy your new speaker voice coils within minutes.
Before operating your audio system, have your radio reflashed via diagnostic software (or an authorized dealer tool). Flashing the head unit flattens the factory EQ curve, providing a clean, flat preamp output signal that lets your amplifier and crossovers handle the acoustic shaping safely.
Setting Amplifier Gains and Eliminating Turn-On Pop
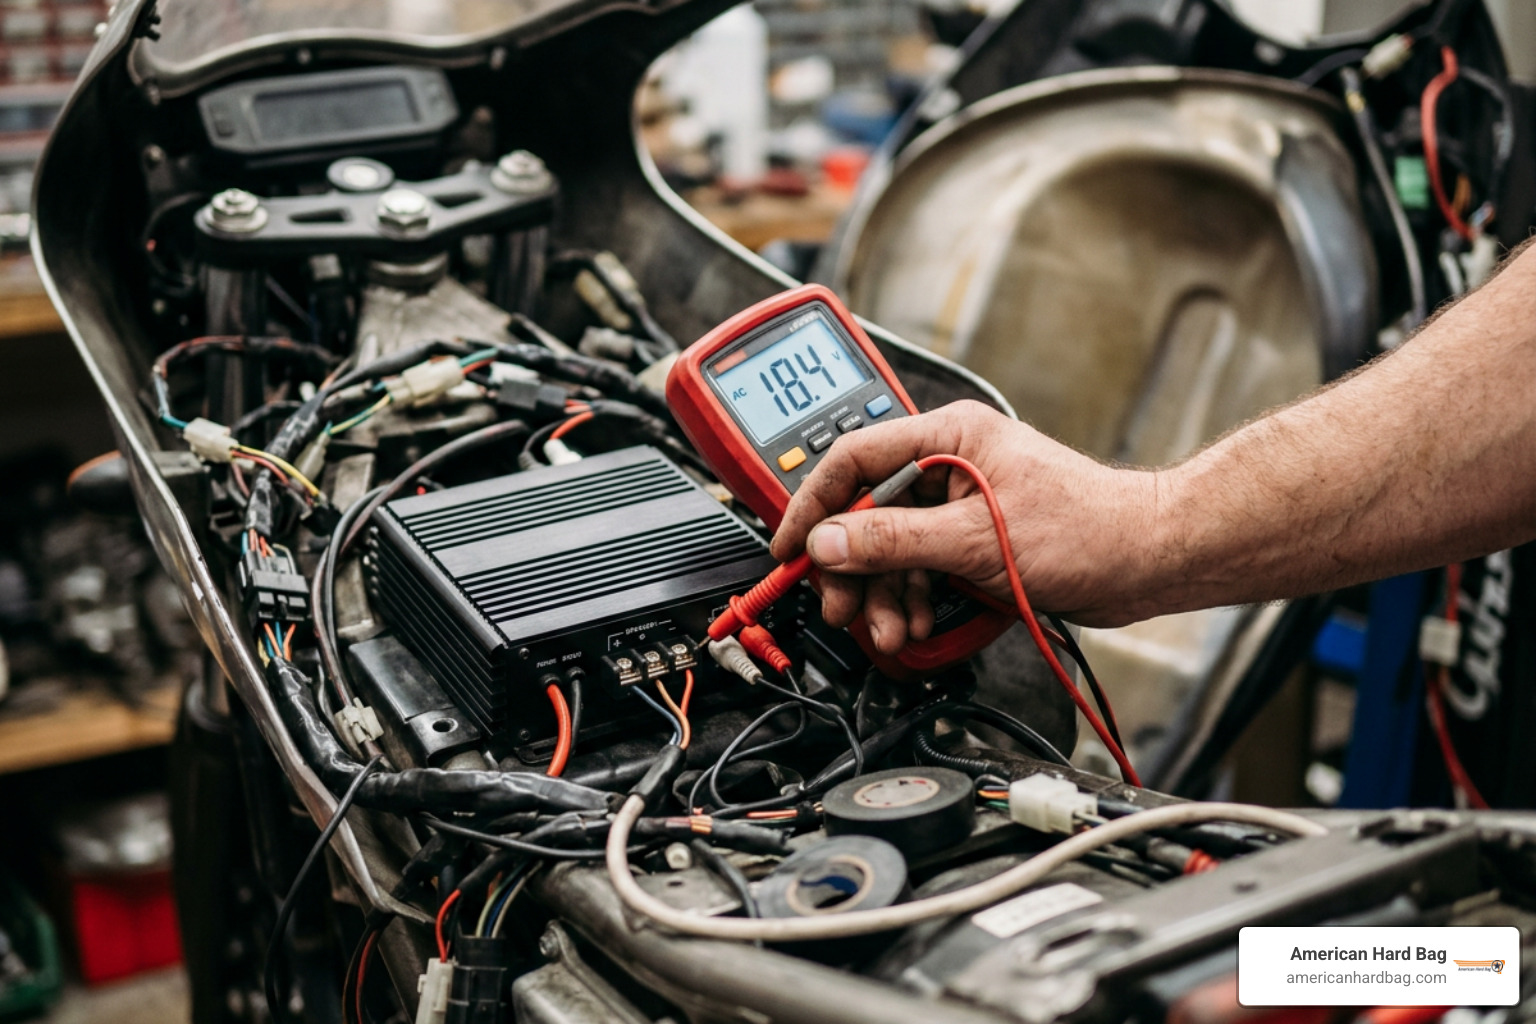
Setting amplifier gains correctly ensures you get crystal-clear output at highway speeds without distortion or thermal shutdown. Never treat a gain knob as a volume control. To dial in precision output, use a digital multimeter measuring AC voltage at the speaker terminals while playing standard test tones (such as a 1 kHz 0 dB sine wave for mids/highs), following our complete tutorial on Harley amplifier setting gains by voltage the correct way.
A common frustration after an amp install is a loud "thump" or pop through the speakers when flipping the ignition switch or hitting the starter. This occurs because the amplifier powers up instantly before the head unit's internal processing stabilizes, or because the heavy starter draw causes system voltage to dip, tripping the amplifier into a momentary red fault protection mode before resetting to green.
Solutions to eliminate turn-on pop:
- VOX Signal Sensing: If your amplifier features auto-sensing VOX / DC offset turn-on, switch it on and disconnect the remote 12V trigger wire.
- Time-Delay Relay / Trigger Module: Install a low-voltage trigger module (such as a PAC TR-4) on the remote turn-on line to delay amplifier startup by 1.5 to 2 seconds until the head unit and electrical voltage normalize.
Frequently Asked Questions About Harley Touring Amplifier Upgrades
Why is a radio EQ flash necessary after installing an amplifier?
Harley-Davidson factory radios have built-in equalization curves engineered specifically to make low-power factory speakers sound acceptable at low speeds. When you install high-powered aftermarket amplifiers and speakers, this extreme bass-boosted factory signal will immediately drive the amplifier into clipping and damage your new speakers. Flashing the radio outputs a flat, clean audio signal that protects your components and delivers balanced sound.
How much additional current does a touring amplifier draw from the electrical system?
A typical high-efficiency Class-D motorcycle amplifier or OEM Stage II Tour-Pak amplifier draws up to 8 amps of additional current during heavy operation. Ensure your charging system, stator, and battery are in excellent health to handle the load, especially if you run other accessories like heated grips or auxiliary lighting.
How do I stop my motorcycle amplifier from popping when starting the bike?
Startup pop occurs when the amplifier turns on before the radio output stabilizes, or when starting the bike drops battery voltage low enough to momentarily trigger the amplifier's protection circuit. You can eliminate startup popping by enabling VOX (speaker-level auto-sensing) on compatible amplifiers or wiring an inexpensive time-delay trigger module into the 12V remote turn-on wire.
Conclusion
A well-executed amplifier installation transforms your riding experience, delivering crisp, punchy audio that easily overcomes road noise and roaring exhaust at highway speeds. By taking your time to route power lines away from ignition interference, securing solid battery connections, daisy-chaining CAN bus networks cleanly, and flashing your factory head unit, you ensure your sound system stays loud and reliable for countless miles.
Ready to take your Harley Touring sound system to the next level? Explore our comprehensive ultimate guide to upgrading your Harley-Davidson's audio system for expert configuration advice, plug-and-play wiring packages, and precision-engineered audio upgrades built specifically for the open road.